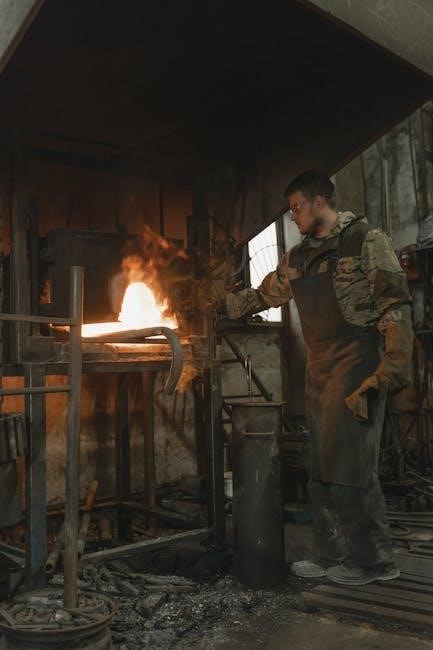
Welcome to the Quadra-Fire family! This manual provides essential guidance for operating and maintaining your Mt. Vernon pellet stove safely and efficiently. It includes detailed instructions‚ safety precautions‚ and troubleshooting tips to ensure optimal performance. Designed to meet EPA certification standards‚ this stove offers reliable heat while minimizing environmental impact. Please read this manual carefully before installation and operation to ensure compliance with all safety guidelines and regulations.
Overview of the Quadra-Fire Mt. Vernon Pellet Stove
The Quadra-Fire Mt. Vernon Pellet Stove is a high-efficiency‚ EPA-certified heating appliance designed for reliable performance and minimal environmental impact. It features a 300W igniter for pellet fuel and is equipped with 5mm ceramic glass for optimal heat retention and viewing. The stove is part of Quadra-Fire’s Advanced Energy lineup‚ emphasizing durability and energy efficiency. It meets U.S. Environmental Protection Agency emission standards for pellet stoves sold after May 15‚ 2015. The Mt; Vernon model is available in various configurations‚ including inserts‚ to suit different installation needs. With a focus on safety and user convenience‚ it includes features like wireless control interfaces and clear operating instructions. This stove is a popular choice for homeowners seeking a clean-burning‚ cost-effective heating solution.
Key Features of the Mt. Vernon AE Model
The Mt. Vernon AE model is an Advanced Energy pellet stove designed for high efficiency and performance. It features a 300W igniter specifically engineered for pellet fuel‚ ensuring reliable ignition and consistent burns. The stove is equipped with 5mm ceramic glass‚ which provides excellent heat retention and a clear view of the flames; This model meets the U.S. Environmental Protection Agency’s emission standards for pellet stoves sold after May 15‚ 2015. The Mt. Vernon AE also includes a wall control interface for easy operation and a wireless user interface option for added convenience. Known for its durability and performance‚ this stove is a popular choice for homeowners seeking a clean-burning‚ energy-efficient heating solution. Its advanced design ensures minimal environmental impact while delivering consistent warmth.
Regulatory Compliance and EPA Certification
The Quadra-Fire Mt. Vernon AE Pellet Insert is fully compliant with the U.S. Environmental Protection Agency’s (EPA) emission standards for pellet inserts. This certification ensures that the stove meets strict environmental requirements‚ producing minimal emissions and offering a clean-burning heating option. The Mt. Vernon AE model is designed to comply with all federal and state regulations‚ making it a eco-friendly choice for homeowners. By adhering to EPA guidelines‚ this stove not only reduces environmental impact but also qualifies for potential rebates and incentives in certain regions. Its advanced engineering and certification underscore Quadra-Fire’s commitment to both performance and sustainability‚ providing homeowners with a reliable and environmentally responsible heating solution.

Safety Precautions and Guidelines
Ensure a safe operating environment by following all safety guidelines in this manual. Keep flammable materials away from the stove and maintain proper ventilation. Regular maintenance is crucial to prevent hazards and ensure efficient performance. Always use approved pellet fuel and adhere to installation requirements. Read the manual thoroughly before operation to familiarize yourself with safety features and emergency procedures. Proper handling of ignition components and electrical systems is essential to avoid potential risks. By following these precautions‚ you can enjoy safe and effective heating with your Quadra-Fire Mt. Vernon pellet stove.

General Fire Safety Tips
Always keep flammable materials‚ such as curtains‚ furniture‚ and rugs‚ at least 3 feet away from the pellet stove. Maintain a safe distance from the stove to avoid burns. Ensure the area around the stove is clear of clutter and obstacles to prevent tripping hazards. Never leave children or pets unattended near the stove. Keep a fire extinguisher or smoke detector nearby in case of emergencies. Avoid overloading the stove with fuel‚ as this can lead to unsafe operating conditions. Regularly inspect the stove and venting system for damage or blockages to prevent fire hazards. Never leave the stove unattended while it is in operation. Always follow local fire safety codes and guidelines for wood-burning and pellet stoves.

Venting Requirements and Installation Safety
Proper venting is critical for safe and efficient operation of the Quadra-Fire Mt. Vernon pellet stove. Use only approved‚ corrosion-resistant venting materials specifically designed for pellet stoves. Ensure the venting system is installed with adequate clearance from combustible materials‚ following local building codes. The vent pipe must be routed vertically or horizontally with proper support to avoid sagging. Never install vents near windows‚ doors‚ or air intakes to prevent carbon monoxide re-entry. Ensure the vent termination is at least 3 feet above the roof and 2 feet above any adjacent rooflines. Conduct regular inspections of the venting system for blockages‚ damage‚ or leaks. Always follow the manufacturer’s installation guidelines and consult a certified professional if unsure. Proper installation ensures safety‚ efficiency‚ and compliance with regulations.
Handling Pellet Fuel Safely
Proper handling of pellet fuel is essential for safety and optimal performance of the Quadra-Fire Mt. Vernon pellet stove. Always store pellets in a cool‚ dry‚ well-ventilated area to prevent moisture absorption‚ which can reduce burn efficiency. Wear gloves and safety goggles when handling pellets to protect against dust and potential eye irritation. Use a pellet-specific scoop or bucket to transfer fuel‚ avoiding the use of bare hands. Ensure the hopper is empty before cleaning or performing maintenance. Never mix different types of pellets‚ as this can cause inconsistent combustion. Keep children and pets away from pellet storage areas. Follow the manufacturer’s guidelines for pellet specifications to ensure compatibility with your stove. Proper handling prevents accidents and maintains the stove’s efficiency and longevity.
Installation Instructions
Follow the Quadra-Fire Mt. Vernon manual for precise installation steps. Ensure site preparation‚ proper venting‚ and electrical connections. Adhere to safety guidelines and local regulations. Consult professionals if unsure to guarantee a safe and efficient setup.
Preparing the Installation Site
Select a suitable location for the Mt. Vernon pellet stove‚ ensuring it is on a level‚ stable‚ and fire-resistant surface. The area must be clear of combustible materials‚ with proper clearance from walls‚ furniture‚ and flammable items. Check local building codes for specific requirements. Ensure the floor can support the stove’s weight‚ including fuel and accessories. Verify that the site is well-ventilated to prevent carbon monoxide buildup. Keep the area away from direct moisture exposure. Plan for easy access to electrical outlets and pellet fuel storage. Follow the manufacturer’s guidelines for clearance distances from windows‚ doors‚ and vents. Protect the surrounding area with heat-resistant mats or shields if necessary. Ensure all safety precautions are met before proceeding with installation.
Connecting Venting Systems
Connecting the venting system for the Quadra-Fire Mt. Vernon pellet stove is a critical step for safe and efficient operation. Begin by gathering all necessary components‚ including the vent pipe‚ connectors‚ and adapters. Ensure all parts are compatible with the stove’s specifications‚ as outlined in the manual. Install the venting system according to the provided diagrams or illustrations‚ ensuring all connections are secure and airtight to prevent leaks and carbon monoxide buildup. Use high-temperature sealants or gaskets to maintain the integrity of the system. Choose the appropriate venting route—through the wall or roof—ensuring compliance with local building codes and regulations. If unsure‚ consider consulting a professional to guarantee safety and compliance. After installation‚ regularly inspect and clean the venting system to maintain proper airflow and functionality.
Installing the Wall Control Interface
Installing the wall control interface for the Quadra-Fire Mt. Vernon pellet stove is a straightforward process that requires attention to detail. Begin by locating the pre-drilled holes on the back of the stove for the interface mounting bracket. Mount the bracket securely using the provided screws‚ ensuring it is level and properly aligned. Next‚ connect the control interface to the stove’s control board‚ following the wiring diagram provided in the manual. Ensure all connections are snug and free from damage. Finally‚ attach the control interface to the wall at a comfortable height‚ using the appropriate wall anchors for your wall type. Test the interface to confirm all functions operate correctly. If unsure‚ consult a licensed technician to ensure proper installation and safety compliance. This step ensures seamless operation of the stove’s features.
Final Inspection and Safety Checks
After completing the installation‚ perform a thorough final inspection and safety checks to ensure the Quadra-Fire Mt. Vernon pellet stove operates safely and efficiently. Verify that all connections‚ including venting‚ electrical‚ and fuel systems‚ are secure and properly sealed. Inspect the venting system for any leaks or damage‚ ensuring it is correctly routed and meets local building codes. Test the wall control interface to confirm all functions‚ such as ignition‚ airflow‚ and heat settings‚ work correctly. Check that the stove is installed with the required clearances from combustible materials. Finally‚ test the stove’s ignition system and ensure the flame is stable and consistent. Address any issues immediately to prevent safety hazards. This final check ensures the stove is ready for safe operation and compliance with regulatory standards. Regular inspections are crucial for maintaining safety and performance. Always follow the manufacturer’s guidelines.
Operating the Mt. Vernon Pellet Stove
Operating the Mt. Vernon pellet stove involves using the wall control interface to regulate ignition‚ heat levels‚ and airflow. Start by ensuring the hopper is filled with premium pellets. Use the interface to set your desired temperature and fan speed. Monitor the flame to ensure proper combustion and adjust settings as needed for optimal performance and efficiency. Regularly check pellet levels and clean the burn pot to maintain consistent operation. Always follow the manufacturer’s guidelines for safe and effective use. Proper operation ensures reliable heating and minimizes maintenance needs.
Understanding the Wall Control Interface
The wall control interface of the Quadra-Fire Mt. Vernon pellet stove is designed for intuitive operation. It features a user-friendly display and buttons to control heat settings‚ fan speed‚ and ignition. The Mode button allows you to switch between manual‚ automatic‚ and timer modes‚ while the Up and Down arrows adjust temperature and airflow. The Light button illuminates the control panel for easier navigation in low-light conditions. The LCD display shows real-time data‚ including current temperature‚ pellet feed rate‚ and system status. Use the Menu button to access advanced settings‚ such as adjusting the ignition delay or resetting the system. Always refer to the manual for detailed instructions on customizing settings and troubleshooting. Proper use of the interface ensures efficient and safe operation of the stove.
The interface also includes a child safety lock feature to prevent accidental changes. To navigate‚ press and hold buttons to scroll through options. This system is designed to optimize heating performance while maintaining ease of use.
Starting and Monitoring the Fire
To start the fire‚ ensure the pellet stove is properly installed and fueled with approved pellets. Press and hold the Ignite button on the wall control until the ignition system activates. You may hear a clicking sound as the igniter heats up. Once the fire starts‚ the control panel will display a confirmation message. Monitor the flame through the ceramic glass to ensure it burns steadily and adjust the airflow as needed using the Airflow button. The stove’s sensors continuously monitor temperature and pellet feed rate to maintain optimal performance. Use the wall control to adjust heat settings or switch to automatic mode for hands-free operation. Always keep the area around the stove clear of flammable materials and ensure proper ventilation for safe combustion.
Regularly inspect the flame color and height to ensure efficient burning. A yellow or smoky flame indicates insufficient airflow‚ which can be corrected by adjusting the venting system or cleaning the burn pot. If the fire goes out‚ allow the stove to cool before restarting to prevent damage.
Adjusting Heat Settings and Airflow
To optimize performance‚ use the wall control interface to adjust heat settings and airflow on your Quadra-Fire Mt. Vernon pellet stove. Press the Heat Adjust button to increase or decrease the heat output‚ displayed on the control panel. For airflow‚ use the Airflow button to regulate the fan speed and combustion air intake. Proper airflow ensures efficient burning and minimizes smoke. Adjustments may be needed based on room size‚ insulation‚ and desired comfort levels. The stove also features an Automatic Mode‚ which adjusts settings based on thermostat input for consistent heating. For precise control‚ use the optional wireless remote control to make adjustments without leaving your seat. Always refer to the manual for specific adjustment guidelines to maintain safety and efficiency.
Regularly monitoring and adjusting these settings ensures optimal performance and energy efficiency throughout the heating season.
Using the Wireless User Interface
The Quadra-Fire Mt. Vernon pellet stove comes with a convenient wireless user interface‚ allowing you to control the stove’s settings from across the room. To use the wireless remote‚ ensure it is properly paired with the stove by following the pairing instructions in the manual. The interface features intuitive buttons for adjusting heat settings‚ turning the stove on/off‚ and monitoring operational status. The remote also displays real-time temperature readings and allows you to set a thermostat for consistent heating. For optimal performance‚ keep the remote within the recommended range of 20 feet from the stove. Replace batteries as needed to maintain functionality. This feature enhances convenience and ensures easy operation without needing to physically access the stove.
Regularly check the remote’s battery levels to avoid interruptions in control.

Maintenance and Upkeep
Regular maintenance ensures optimal performance and safety. Clean the stove‚ venting system‚ and internal components as specified. Inspect for wear and tear‚ and replace parts as needed. Follow the manual’s guidelines for routine checks and professional servicing to maintain efficiency and safety. Always use genuine Quadra-Fire parts for replacements.

Cleaning the Ceramic Glass
To maintain clear visibility and efficiency‚ clean the ceramic glass regularly. Turn off the stove and allow it to cool completely. Use a soft cloth and a glass cleaner specifically designed for ceramic surfaces. Avoid abrasive materials or harsh chemicals‚ as they may scratch the glass. For tough residue‚ apply the cleaner and let it sit before wiping clean. Dry the glass thoroughly with a lint-free cloth to prevent streaks. Regular cleaning ensures optimal viewing and heat distribution. Always follow the manufacturer’s recommendations for cleaning products and techniques to preserve the ceramic glass’s integrity and longevity. This simple maintenance step enhances both functionality and aesthetic appeal. Cleaning should be done at least once a week‚ or more frequently if the stove is used heavily.
Inspecting and Replacing Igniter Elements
Regular inspection of the igniter elements is crucial for ensuring reliable operation of the Mt. Vernon pellet stove. Turn off the stove‚ allow it to cool‚ and disconnect power before starting. Use a flashlight to examine the igniter for signs of wear‚ such as cracks‚ discoloration‚ or excessive soot buildup. If damage is found‚ replacement is necessary. To replace‚ remove the mounting screws‚ disconnect the electrical connector‚ and install the new igniter. Ensure it is securely fastened and connected properly. Always use genuine Quadra-Fire replacement parts to maintain performance and safety. Inspect the igniter annually or more frequently if you notice ignition delays. Proper maintenance prevents ignition issues and ensures efficient stove operation. Always follow safety guidelines when handling electrical components.
Performing Routine Cleaning of Internal Components
Routine cleaning of internal components is essential for maintaining the efficiency and safety of your Quadra-Fire Mt. Vernon pellet stove. Begin by turning off the stove and allowing it to cool completely. Remove ashes and debris from the burn pot‚ ash pan‚ and heat exchanger using a vacuum or soft brush. Inspect the venting system for blockages and clean it if necessary. Use a damp cloth to wipe down interior surfaces‚ ensuring no residue remains. Clean the auger and fuel feed system to prevent pellet jams. Regular cleaning prevents buildup and ensures proper airflow‚ which is critical for optimal performance. Always refer to the manual for specific cleaning intervals and guidelines. Proper maintenance extends the lifespan of your stove and ensures safe‚ efficient operation. Cleanliness is key to avoiding issues and maintaining warranty compliance. Schedule cleaning after each use and at the end of the heating season.
Scheduling Annual Professional Maintenance
Annual professional maintenance is crucial to ensure the Quadra-Fire Mt. Vernon pellet stove operates efficiently and safely. Hire a certified technician to inspect and service your stove‚ focusing on critical components like the venting system‚ combustion chamber‚ and electrical controls. They will also check for wear and tear on seals‚ gaskets‚ and igniter elements. Professional maintenance helps identify potential issues before they escalate‚ ensuring reliable performance during the heating season. Schedule this service during the off-season to avoid delays. Regular maintenance not only prolongs the stove’s lifespan but also maintains its warranty and compliance with safety standards. A well-maintained stove burns cleaner‚ reducing emissions and improving overall efficiency. Always use a technician authorized by Quadra-Fire to guarantee quality service and adherence to manufacturer guidelines. This annual checkup is essential for optimal functionality and peace of mind. Ensure to keep maintenance records for future reference.

Troubleshooting Common Issues
Troubleshooting common issues with your Quadra-Fire Mt. Vernon pellet stove involves identifying malfunctions‚ checking error codes‚ and addressing ignition or pellet feeding problems promptly. Always consult the manual or contact certified support for professional assistance to resolve issues safely and efficiently‚ ensuring your stove operates correctly and maintains its warranty. Regular checks can prevent many common problems‚ but professional intervention is recommended for complex repairs. This ensures optimal performance‚ safety‚ and longevity of your stove. Always follow manufacturer guidelines for troubleshooting to avoid further complications. Proper diagnosis and timely resolution are key to maintaining reliability and efficiency. Keep your stove functioning smoothly by addressing issues promptly.
Diagnosing Ignition Problems
Diagnosing ignition problems in your Quadra-Fire Mt. Vernon pellet stove begins with checking the igniter for wear or damage. A faulty igniter may fail to light the pellets properly. Ensure the igniter is clean and free of debris‚ as dirt or soot can disrupt its function. If the igniter is damaged‚ it may need to be replaced. Additionally‚ check the pellet fuel quality‚ as poor-quality or damp pellets can prevent proper ignition. Verify that the airflow settings are correct‚ as insufficient airflow can also hinder ignition. Finally‚ inspect the electrical connections to ensure they are secure and functioning. If issues persist‚ consult the manual or contact a certified technician for professional assistance. Regular maintenance‚ such as cleaning the igniter and ensuring proper fuel conditions‚ can help prevent ignition problems. Always follow safety guidelines when troubleshooting to avoid hazards. Proper diagnosis ensures reliable operation and safety.
Resolving Pellet Feeding Issues
Pellet feeding issues in the Quadra-Fire Mt. Vernon stove can often be resolved by checking the auger and feed system. Ensure the hopper is filled with high-quality pellets and not empty. If pellets are not flowing‚ inspect the auger motor for proper operation and ensure it is free from blockages. Clean the auger and feed tube regularly to prevent jams caused by pellet dust or debris. Verify that the feed rate settings on the control interface are correctly adjusted for optimal performance. If the issue persists‚ check for any obstructions in the pellet chute or burn pot. Ensure the stove is on a level surface‚ as tilting can disrupt pellet flow. If problems continue‚ consult the manual or contact a certified technician for assistance. Regular cleaning and proper pellet storage can help prevent feeding issues. Always follow safety guidelines when servicing the stove.
Addressing Error Codes and Alarms
If your Quadra-Fire Mt. Vernon pellet stove displays an error code or triggers an alarm‚ it is essential to address the issue promptly to ensure safe and efficient operation. Start by referring to the error code list in your manual to identify the specific problem. Common codes include issues related to temperature‚ airflow‚ or ignition. Check the control interface display for the code and follow the recommended troubleshooting steps. For example‚ if the stove detects a lack of airflow‚ ensure the venting system is clear and functioning properly. If the issue persists‚ perform a power reset by turning the stove off and on again. Clean the sensors and internal components as needed. If the problem cannot be resolved‚ contact a certified Quadra-Fire technician for professional assistance. Always follow safety guidelines when addressing alarms or error codes. Regular maintenance can help prevent these issues.
Replacement Parts and Accessories
For the Quadra-Fire Mt. Vernon pellet stove‚ genuine replacement parts are essential for optimal performance and safety. Always purchase compatible accessories from authorized dealers.
Identifying Compatible Replacement Parts
Identifying compatible replacement parts for the Quadra-Fire Mt. Vernon pellet stove is crucial for maintaining performance and safety. Always refer to the official Quadra-Fire parts catalog or the stove’s user manual to ensure accuracy. Part numbers and descriptions are provided for each component‚ such as igniters‚ gaskets‚ and glass panels. Verify compatibility by cross-referencing the model number of your stove with the parts list. Using non-genuine or incompatible parts can void the warranty and pose safety risks. For assistance‚ contact Quadra-Fire customer support or consult an authorized dealer. This ensures you receive authentic and durable components designed specifically for your stove. Regularly updating with the correct parts guarantees efficient operation and longevity of your Quadra-Fire Mt. Vernon pellet stove.
Purchasing Genuine Quadra-Fire Parts
Purchasing genuine Quadra-Fire parts is essential for maintaining the performance‚ safety‚ and warranty of your Mt. Vernon pellet stove. Always buy from authorized Quadra-Fire dealers or directly from the manufacturer to ensure authenticity and quality; Genuine parts are designed to meet strict safety and efficiency standards‚ while counterfeit or third-party alternatives may compromise your stove’s operation. When ordering‚ provide your stove’s model number to ensure compatibility. Avoid online marketplaces unless verified as official distributors. Genuine parts come with a warranty and are engineered to last‚ protecting your investment. Using non-genuine parts can void your stove’s warranty and pose safety risks. Quadra-Fire’s customer service can assist in locating authorized retailers or verifying part authenticity. Always prioritize genuine components for reliability and peace of mind.
Installing Replacement Glass and Gaskets
Installing replacement glass and gaskets on your Quadra-Fire Mt. Vernon pellet stove is a straightforward process when done correctly. Begin by turning off the stove and allowing it to cool completely. Wear gloves and safety goggles to protect yourself from sharp edges. Remove the trim and bezel surrounding the glass using a screwdriver. Carefully lift out the old glass and set it aside. Inspect the gasket seals and remove any debris or adhesive residue. Apply a small amount of high-temperature sealant to the new gasket before pressing it into place. Insert the replacement glass‚ ensuring it fits snugly within the frame. Reattach the trim and bezel‚ tightening screws firmly but avoiding overtightening. Turn the stove on at a low setting to test for leaks. Always use genuine Quadra-Fire replacement parts to ensure a proper seal and maintain safety.