vulcan gas wall heater manual

Vulcan Gas Wall Heater Manual: A Comprehensive Guide

This manual provides detailed instructions for Vulcan gas wall heaters, covering installation, operation, maintenance, and troubleshooting for various models․

Understanding Your Vulcan Gas Wall Heater

Vulcan gas wall heaters offer efficient and reliable heating solutions for various spaces․ These units are designed for easy installation, adaptable to both wall-mounted and recessed applications․ Understanding your heater’s components, like the heating element and gas valve, is crucial for safe and effective operation․ Each model features a unique serial number and operating parameters, detailed on affixed labels․

Proper functionality relies on correct gas supply – natural gas or propane – and appropriate gas pressure․ Familiarize yourself with these aspects for optimal performance and longevity of your Vulcan heater․

Safety Precautions

Prioritize safety when installing and operating your Vulcan gas wall heater․ Always ensure proper ventilation to prevent carbon monoxide buildup․ Never attempt repairs without disconnecting the gas supply․ Regularly check for gas leaks using a suitable detection method․ Keep flammable materials away from the heater’s vicinity․

Inspect the unit for damage before each use․ If you detect any issues, discontinue operation and contact qualified service personnel․ Adhering to these precautions ensures safe and reliable heating performance․

Identifying Your Vulcan Heater Model

Accurate model identification is crucial for obtaining the correct parts and service information․ The model and serial number are typically located on a label affixed to the unit․ Common locations include behind the kick panel or on the unit’s exterior casing․

Refer to the heater’s documentation for specific placement details․ Knowing your heater’s model number allows you to access tailored resources and ensure compatibility when performing maintenance or repairs․

Locating the Model and Serial Number

To find your Vulcan heater’s model and serial number, begin by inspecting the unit’s exterior․ On many wall-mounted units, the label is situated behind the lower kick panel, requiring its removal for access․ If not found there, carefully check other exterior surfaces, including the sides and back of the heater․

The label will clearly display both the model number and the unique serial number, essential for parts identification and warranty claims․

Decoding the Model Number

The Vulcan model number provides crucial information about your heater’s specifications and features․ Each affixed label includes a unique model number alongside the serial number and orifice size․ Understanding this code helps identify compatible replacement parts and specific operating parameters․

The number often indicates the heater type, BTU output, and gas type compatibility (natural gas or propane)․ Refer to Vulcan’s official documentation or contact support for a detailed breakdown of your specific model’s code․

Installation Guidelines

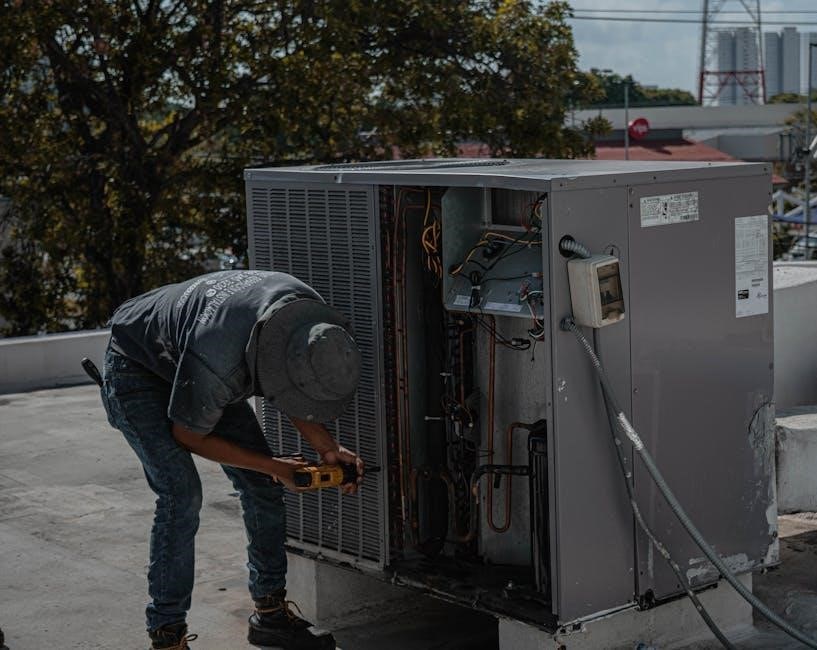
Proper installation is critical for safe and efficient operation of your Vulcan gas wall heater․ Vulcan gas models are designed for versatile installation, accommodating both direct-to-wall mounting and recessed configurations․ Ensure the chosen location meets all local gas and safety codes․

Always verify adequate ventilation and clearance from combustible materials․ Professional installation by a qualified technician is strongly recommended to guarantee correct gas connection and safe operation․ Incorrect installation can lead to hazardous conditions․

Wall Mounting Considerations

When mounting your Vulcan gas wall heater, select a structurally sound wall capable of supporting the unit’s weight․ Maintain the manufacturer’s specified clearances from surrounding walls and objects, ensuring adequate airflow for optimal performance and safety․

Verify the wall surface is level and free of obstructions․ Use appropriate mounting hardware, suitable for the wall type, and follow the provided diagrams carefully․ Securely fasten the heater to prevent movement or vibration during operation․

Gas Connection Requirements

Connecting your Vulcan gas wall heater requires adherence to local gas codes and regulations․ A qualified technician must perform the gas line connection, ensuring a leak-free seal using approved pipe joint compound․ Verify the gas supply matches the heater’s specified fuel type – either natural gas or propane․

Install a manual shut-off valve upstream of the heater for easy access during maintenance or emergencies․ Properly size the gas supply line to meet the heater’s BTU input requirements, preventing insufficient gas flow․ Always perform a leak test after connection․

Operating Instructions

Before initial startup, ensure the gas supply is on and the heater is properly installed․ Follow the lighting instructions printed on the heater’s label – typically involving turning the gas control to “Pilot,” pressing and holding the pilot button, and igniting the pilot flame․ Once lit, continue holding the button for a specified time․

After successful pilot ignition, turn the control to “On” to activate the main burner․ Adjust the heat settings using the thermostat control to achieve the desired room temperature․ Never leave the heater unattended while operating․

Initial Startup Procedure

Prior to the first use, thoroughly inspect the unit for any shipping damage․ Confirm the gas valve is in the “Off” position․ Slowly turn the gas supply on, checking for leaks with a soap solution – bubbles indicate a leak․ Turn the control knob to “Pilot” and depress the pilot button․ Simultaneously, ignite the pilot with a long lighter․

Continue holding the pilot button for approximately 30-60 seconds after ignition․ If the pilot flame remains lit after releasing the button, turn the control knob to “On” and set the desired temperature․ Monitor operation closely․

Adjusting Heat Settings

Your Vulcan gas wall heater offers adjustable heat output via a control knob or electronic thermostat․ Rotate the knob clockwise to increase heat and counter-clockwise to decrease it․ For models with a thermostat, set the desired room temperature using the up and down arrows․

Allow sufficient time for the heater to reach the selected setting․ Avoid rapid adjustments, as this can strain the system․ Regularly monitor room temperature to ensure comfort and efficient operation․ Some models feature multiple heat settings for customized warmth․

Maintenance and Troubleshooting

Regular maintenance ensures optimal performance and longevity of your Vulcan gas wall heater․ Periodically clean the exterior with a damp cloth, avoiding harsh chemicals․ Inspect the burner assembly for debris and obstructions․ A faulty pilot light is a common issue; refer to the dedicated section for troubleshooting steps․

If you encounter problems, consult the troubleshooting guide before contacting support․ Always prioritize safety and disconnect the gas supply before performing any maintenance or repairs․ Proper care prevents costly issues․

Regular Cleaning Procedures

To maintain your Vulcan gas wall heater’s efficiency, regular cleaning is crucial․ Begin by turning off the gas supply and allowing the unit to cool completely․ Use a vacuum cleaner with a brush attachment to remove dust and debris from the exterior vents and burner area․

Wipe down the cabinet with a damp cloth and mild detergent․ Avoid abrasive cleaners․ Inspect the burner for any obstructions and carefully clean if necessary․ Consistent cleaning ensures safe and efficient operation․

Checking the Pilot Light

A stable pilot light is essential for your Vulcan gas wall heater’s operation․ Locate the pilot light access panel, typically on the lower section of the unit․ Follow the manufacturer’s instructions to safely access the pilot light assembly․ Observe the flame – it should be blue and steady․

If the flame is yellow, weak, or flickering, consult the troubleshooting section․ Never attempt repairs yourself; contact a qualified technician․ A properly functioning pilot light ensures reliable heating․

Component Overview

Your Vulcan gas wall heater comprises several key components․ The heating element, specified by wattage and voltage, generates warmth․ The gas valve regulates gas flow to the burner, ensuring safe and efficient combustion․ A pilot light assembly initiates the heating process․

Additionally, a control system manages temperature settings and safety features․ Understanding these components aids in maintenance and troubleshooting․ Refer to the parts diagram for specific locations and specifications for your model․

Heating Element Specifications

Vulcan gas wall heater heating elements vary in wattage and voltage depending on the model․ Checking resistance is crucial for diagnosis; compare measured resistance to specified values․ If discrepancies exist, element replacement is necessary․

V Series heaters have specific resistance values tied to their wattage․ Always consult the parts list or wiring diagram for your exact model to determine the correct specifications․ Incorrect elements can lead to inefficient heating or safety hazards․

Gas Valve Functionality

The gas valve regulates gas flow to the burner, controlled by the thermostat and safety mechanisms․ It features multiple stages – pilot, low heat, and high heat – adjusting output based on demand․ Proper operation is vital for safe and efficient heating․

Ensure the valve receives correct gas pressure (refer to ‘Gas Supply and Pressure’)․ A malfunctioning valve can cause insufficient heating, erratic operation, or gas leaks․ Regular inspection and professional servicing are recommended for optimal performance and safety․

Troubleshooting Common Issues

Addressing issues promptly ensures safe and efficient heater operation․ No Heat Output often stems from a faulty pilot light, gas supply problems, or a malfunctioning gas valve․ Pilot Light Problems may involve a dirty pilot assembly, weak thermocouple, or low gas pressure – always attempt relighting following ‘Operating Instructions’․

If issues persist, do not attempt complex repairs; consult a qualified technician․ Ignoring problems can lead to hazardous situations, including gas leaks or carbon monoxide buildup․ Prioritize safety!

No Heat Output

If your Vulcan heater isn’t producing heat, several factors could be at play․ First, check the gas supply – is the valve open? A faulty pilot light is a common culprit; ensure it’s lit and stable․ Inspect the heating element for damage, referencing ‘Component Overview’ for specifications․

A malfunctioning gas valve or a tripped high-limit switch can also cause this issue․ Check resistance of the heating element against the specified wattage and voltage․ If problems continue, professional service is recommended․

Pilot Light Problems

A flickering or extinguished pilot light indicates potential issues․ First, ensure the gas supply is active and the valve is fully open․ A dirty pilot orifice can restrict gas flow, requiring cleaning․ Check the thermocouple – a faulty one won’t maintain the pilot flame․

If the pilot won’t stay lit after repeated attempts, a damaged gas valve might be the cause․ Always follow safety precautions when working with gas․ Consult a qualified technician if you’re uncomfortable troubleshooting this yourself․

Replacing Parts

When replacing components, always disconnect the gas and electrical supply first for safety․ Identifying the correct part number is crucial; refer to your heater’s model number and parts diagrams․ Sources for parts include appliance parts retailers and directly from Vulcan support․

Ensure the replacement part matches the specifications of the original․ Improper parts can cause malfunctions or safety hazards․ Document the process with photos for future reference, and always test the heater after installation․

Finding the Correct Part Number

Locating the correct part number begins with identifying your Vulcan heater’s model number․ This is typically found on a label affixed to the unit, often behind the kick panel or on the exterior casing․ Refer to the manual or search online using the model number to access parts diagrams․

Cross-reference the component you need with the diagram to find the corresponding part number․ Websites specializing in appliance parts often have search functions by model number․

Heating Element Replacement

Before replacing the heating element, disconnect the gas and electrical supply to the Vulcan heater․ Access the element by removing the protective cover, following the disassembly instructions in your manual․ Carefully disconnect the wiring from the old element, noting its configuration․

Install the new element, ensuring secure connections․ Check the resistance using a multimeter; values should match specifications․ Reassemble the heater, and test its functionality after restoring power and gas․

Gas Supply and Pressure

Vulcan gas wall heaters are compatible with both natural gas (NG) and propane (LP)․ Ensure the heater is configured for the correct gas type before operation․ Incorrect configuration can lead to inefficient combustion and safety hazards․ Verify the incoming gas pressure matches the heater’s requirements, typically specified on the data plate․

Regularly check gas pressure using a manometer to maintain optimal performance․ Low pressure can cause weak heating, while excessive pressure may damage components․

Natural Gas vs․ Propane

Vulcan heaters are engineered to operate efficiently with either natural gas or propane, but conversion is required․ Natural gas systems deliver fuel via public utility lines at lower pressures, while propane utilizes pressurized tanks․ Check the heater’s label for its original gas type․

Converting between fuels necessitates a qualified technician to replace the orifice and adjust the gas valve․ Using the incorrect orifice will result in improper combustion and potential safety risks․ Always verify correct operation post-conversion․

Checking Gas Pressure

Maintaining correct gas pressure is crucial for optimal Vulcan heater performance and safety․ A qualified technician should perform this check using a manometer connected to the gas supply line before the gas valve․ Refer to the heater’s data plate for specified pressure requirements – typically measured in inches of water column․

Low gas pressure can cause inefficient heating, while excessive pressure poses a fire hazard․ Regular checks, especially after gas supply work, ensure safe and reliable operation․ Never attempt to adjust gas pressure yourself․

Electrical Requirements

Vulcan gas wall heaters require a dedicated electrical circuit for safe and reliable operation․ Most models operate on standard 120V AC power, but amperage varies depending on the unit’s size and features․ Check the heater’s data plate for specific voltage and amperage requirements before installation․

Proper grounding is essential to prevent electrical shock․ Wiring diagrams are typically located inside the unit’s control panel or within this manual․ Always disconnect power before performing any electrical work․

Voltage and Amperage

Vulcan gas wall heaters generally require 120-volt electrical service, though specific models may differ․ Amperage draw typically ranges from 5 to 15 amps, depending on the heater’s BTU output and features like fans․ Check the unit’s nameplate for precise voltage and amperage specifications․

Using an incorrect voltage or amperage can damage the heater and void the warranty․ Ensure the electrical circuit is appropriately sized and protected by a circuit breaker or fuse․

Wiring Diagrams

Vulcan gas wall heater wiring typically involves a standard three-prong plug for 120V connection․ Diagrams illustrate connections for the gas valve, blower motor (if equipped), and safety controls․ Refer to the specific wiring diagram included with your heater model, as configurations vary․

Incorrect wiring can create a fire hazard or damage the unit․ If you are uncomfortable with electrical work, consult a qualified technician․ Always disconnect power before attempting any wiring modifications․

Error Codes and Diagnostics

Vulcan gas wall heaters may display error codes to indicate specific malfunctions․ These codes assist in pinpointing the source of the problem, simplifying diagnostics․ Common codes relate to flame sensor issues, gas valve failures, or overheating protection activation․

Consult the error code table in this manual for a detailed explanation of each code and recommended troubleshooting steps․ Ignoring error codes can lead to further damage or unsafe operation․ Always prioritize safety when addressing error messages․

Interpreting Error Messages

Error messages displayed on your Vulcan heater’s control panel are crucial for identifying operational issues․ A flashing code indicates a specific problem, requiring immediate attention․ Refer to the comprehensive error code list within this manual to decode each message accurately․

Understanding the code’s meaning allows for targeted troubleshooting, potentially avoiding unnecessary service calls․ Note the error code before attempting any repairs, and always prioritize safety by disconnecting the gas supply if unsure․

Warranty Information

Vulcan gas wall heaters are covered by a limited warranty against defects in materials and workmanship․ This warranty begins on the date of original purchase, as evidenced by the sales receipt․ The duration varies depending on the component; typically, the heat exchanger enjoys the longest coverage period․

Warranty does not cover damage resulting from improper installation, misuse, or lack of regular maintenance․ Retain your proof of purchase and contact Vulcan support for claim procedures․

Frequently Asked Questions (FAQ)

Q: Where can I find my heater’s model number? A: Typically, it’s located behind the kick panel or on a label affixed to the unit․ Q: What if my heater isn’t producing heat? A: Check the pilot light and gas supply first․ Refer to the troubleshooting section for detailed steps․

Q: How do I identify the correct replacement part? A: Use the model number to search for compatible parts․ Q: Is professional installation required? A: Yes, for safety and warranty validity․

Contacting Vulcan Support

For immediate assistance with your Vulcan gas wall heater, please utilize the following contact methods․ Telephone support is available at 86 0379-60695596․ Alternatively, you can reach a representative via mobile/WhatsApp at 86 18003790835․

Email inquiries can be sent to sale@․ For general information and downloads, visit the official website․ Ensure you have your model and serial number ready when contacting support to expedite the process․ Dedicated professionals are available to address your concerns․

b&d controll a door manual

B&D Controll-A-Door Manual⁚ An Overview

B&D Controll-A-Door manuals provide essential guidance for operating and maintaining your garage door opener. These manuals cover various models, offering detailed instructions and safety information. They are a vital resource for users.

B&D Controll-A-Door Models

The B&D Controll-A-Door series includes several models, each designed for specific needs. Among these are the Controll-A-Door Advance, known for its compatibility with smart accessories like Remootio. The Controll-A-Door 4 model integrates with iSmartgate for enhanced connectivity; Additionally, the Controll-A-Door S is a sectional door opener, while the Controll-A-Door P model is also a sectional door opener. The Controll-A-Door R model completes the range, catering to different door types and operational requirements. Each model’s manual provides specific details for installation and operation. These diverse models ensure a suitable option for various garage door setups and user preferences.

Controll-A-Door Advance Manual

The Controll-A-Door Advance manual offers comprehensive instructions for users of this specific model. It details the installation process, ensuring proper setup for optimal performance. The manual also covers the operation of the opener, including how to use the remote controls and other features. Notably, it highlights the compatibility of the Advance model with Remootio, a smart accessory that enables smartphone control. This section of the manual is crucial for users looking to integrate smart technology with their garage door. The manual also provides safety guidelines and troubleshooting tips to help users maintain their system effectively and safely. Accessing this manual ensures proper use and longevity of the opener.

Controll-A-Door 4 Manual

The Controll-A-Door 4 manual provides specific guidance for users of the B&D Controll-A-Door 4 opener. It includes detailed instructions for installation, ensuring that the opener is correctly set up. The manual also covers the operational aspects of the device, including how to use its various features and functions. A key focus is its compatibility with the ismartgate accessory, a Wi-Fi-enabled smart device that allows for advanced garage door control and monitoring. The manual outlines the necessary steps to integrate this smart technology. Furthermore, it includes important safety precautions and troubleshooting advice, ensuring users can safely operate and maintain their opener. This manual is essential for the proper use and longevity of the system.

Controll-A-Door S Manual

The Controll-A-Door S manual is specifically designed for B&D’s Controll-A-Door S sectional garage door opener. This manual provides homeowners with crucial information on the installation and operation of the SDO-3 model. It includes detailed instructions for proper setup to ensure safe and reliable performance. Additionally, the manual covers important safety warnings and precautions that users should adhere to while operating the opener. The manual also contains information on troubleshooting common issues that may arise with the Controll-A-Door S system. Furthermore, it guides users on accessing additional resources and support to enhance their understanding of the device. This resource is essential for maintaining and optimizing the performance of the Controll-A-Door S.

Controll-A-Door P Manual

The Controll-A-Door P manual is an essential guide for users of the B&D Controll-A-Door P sectional garage door opener. This manual offers comprehensive instructions on the operation and maintenance of the specific P model. It includes details on installation procedures, safety guidelines, and troubleshooting tips for common issues. The manual also provides insights into the specific features of the Controll-A-Door P, ensuring users can optimize its performance. It serves as an invaluable resource for homeowners, facilitating safe and efficient use. Moreover, the manual helps users understand the functionalities and capabilities of the door opener. This ensures proper usage and maintenance of the Controll-A-Door P system.

Controll-A-Door R Manual

The Controll-A-Door R manual provides crucial information for users of the B&D Controll-A-Door R gate opener. This manual offers detailed guidance on the operation, maintenance, and safety aspects specific to the R model. It includes instructions for installation, remote control programming, and manual release procedures. The manual also covers troubleshooting common problems and offers helpful tips for optimal performance. Users can access the latest version of the manual online, ensuring they have the most up-to-date information. The manual’s comprehensive approach helps users understand and utilize all the features of the Controll-A-Door R system. It is a key resource for both new and existing users. Proper understanding of the manual ensures safe and effective usage.

Manual Operation and Safety

This section details how to manually operate your B&D Controll-A-Door system and provides important safety warnings. Understanding these procedures is crucial for safe usage and preventing accidents.

Manual Release Operation

The manual release mechanism on your B&D Controll-A-Door opener allows you to disengage the motor and operate the door manually. This is essential during power outages or when the opener malfunctions. To activate, locate the release cord, usually red, and pull it firmly downwards. This disengages the trolley, allowing you to lift the door by hand. Always ensure the door is fully closed before activating the manual release. Be cautious, as the door may be heavy and could move unexpectedly. After power is restored, re-engage the motor by pulling the cord again until you hear a click. Test the automatic operation after re-engagement to ensure it’s working properly. Never leave the door disengaged unless necessary and always be careful when using the manual release.

Safety Warnings and Precautions

Safety is paramount when operating a B&D Controll-A-Door opener. Never allow children to operate the door or its controls. Ensure the area is clear of obstructions before activating the opener. Regularly inspect the door and opener for any signs of damage. Do not attempt repairs yourself; contact a qualified technician. Be aware that the door can move unexpectedly, so never stand under a moving door. Always use the manual release with caution, and only when necessary. Keep all remote controls away from children, and never leave the door unattended while in manual mode. Always be alert and aware of the potential hazards associated with automatic garage doors.

Installation and Programming

Proper installation and programming are crucial for optimal performance. B&D manuals provide detailed steps for safe setup and remote control configuration. Always follow instructions carefully for best results.

Installation Instructions

B&D Controll-A-Door installation manuals offer step-by-step guidance for professional installers and homeowners alike. These instructions cover crucial safety warnings, ensuring a secure setup process. The manuals emphasize following all steps carefully to prevent any accidental door operation during installation. They also highlight the importance of mounting the door control button in a visible but child-safe location. Proper installation is vital for the safety and functionality of the opener, and consulting the manual before beginning the process is highly recommended. These manuals include information for various B&D models, ensuring compatibility and correct setup procedures. They also include references from inside looking out.

Remote Control Programming

B&D Controll-A-Door manuals include clear instructions for programming remote controls, allowing for easy operation of your garage door. The manuals guide users through the steps of pairing new remote controls, often involving pressing specific buttons on both the opener and the remote. These instructions emphasize doing this within a certain time frame for the remote to register correctly. The process is typically straightforward, but the manuals provide visual aids and detailed explanations to ensure successful programming. They also offer guidance for when adding multiple remotes. Following the instructions carefully is essential for correct functionality and avoiding any programming issues. The manuals often include troubleshooting tips for common problems in programming.

Smart Features and Accessories

B&D Controll-A-Door systems offer compatibility with smart accessories like Remootio and iSmartgate, enhancing functionality. These integrations allow for smartphone control and other smart home features.

Compatibility with Smart Accessories

B&D Controll-A-Door openers are designed to integrate seamlessly with various smart accessories, enhancing their functionality and user experience. Specifically, models like the Controll-A-Door Advance are compatible with Remootio, a Wi-Fi and Bluetooth-enabled smart gate opener. This allows users to control their garage doors via their smartphones. Similarly, the Controll-A-Door 4 model works with iSmartgate, a Wi-Fi-enabled device that adds smart features to garage doors and gates. These smart integrations often support platforms like Apple HomeKit, Amazon Alexa, and Samsung SmartThings, providing a wide range of smart home automation possibilities. These accessories transform a standard garage door opener into a smart, connected device.

Using Remootio and iSmartgate

Remootio and iSmartgate are smart accessories designed to enhance B&D Controll-A-Door openers. Remootio, compatible with models like Controll-A-Door Advance, enables smartphone control via Wi-Fi and Bluetooth. It allows users to open, close, and monitor their garage doors remotely. iSmartgate, compatible with Controll-A-Door 4, offers similar smart functionalities through Wi-Fi connectivity. It integrates with smart home platforms like Apple HomeKit, Amazon Alexa, and Samsung SmartThings, providing voice control and automation capabilities. These accessories require proper setup and pairing with the opener and the user’s smart devices. The manuals for these devices often provide detailed step-by-step guides to ensure correct installation and usage, transforming your garage door into a smart, connected part of your home.

Maintenance and Support

Maintaining your B&D Controll-A-Door system is crucial for longevity. User manuals offer guidance, while troubleshooting resources help resolve issues. Support is available for further assistance.

Accessing User Manuals

B&D provides user manuals for all its garage door openers, including the Controll-A-Door series. These manuals are essential for understanding the operation and maintenance of your specific model. You can typically find these manuals online through the B&D website, often in PDF format, allowing for easy download and access. Some manuals might be included with your purchase, but digital versions are always available for convenience. These resources are designed to help both homeowners and professional installers with any queries, ensuring safe and efficient operation of their B&D garage door systems. They cover aspects from basic operation to troubleshooting guides and specific model features.

Troubleshooting and Support

For any issues with your B&D Controll-A-Door opener, refer to the troubleshooting section in your user manual. This section offers solutions to common problems, such as remote control malfunctions or door operation difficulties. If the manual doesn’t resolve your issue, B&D provides customer support through various channels, including online help centers and phone support. They also offer authorized service technicians who can assist with more complex repairs and maintenance. Utilizing these resources can help keep your garage door operating smoothly. Remember to always follow safety guidelines when troubleshooting or attempting repairs. B&D’s support ensures reliable solutions for all their products.

how to talk anyone pdf

Effective communication is a critical skill‚ impacting personal and professional success. Mastering it opens doors to stronger relationships and career advancements. This guide explores key techniques to enhance your ability to connect with anyone.

The Importance of Communication Skills

Communication skills are fundamental to human interaction‚ influencing how we build relationships‚ navigate social situations‚ and achieve our goals. Effective communication allows us to express ourselves clearly‚ understand others’ perspectives‚ and foster meaningful connections. In the workplace‚ strong communication skills are essential for collaboration‚ leadership‚ and career advancement. They enable us to network effectively‚ present ideas persuasively‚ and resolve conflicts constructively. Furthermore‚ the ability to talk to anyone‚ regardless of background or circumstance‚ can significantly enrich our lives‚ leading to new friendships‚ romantic partnerships‚ and opportunities. Mastering these skills can empower us to be more confident and socially successful‚ improving our overall well-being.

Key Techniques from “How to Talk to Anyone”

Leil Lowndes’ book provides 92 techniques for social success. These include strategies for first meetings and sophisticated communication‚ empowering individuals to connect with anyone.

The Flooding Smile Technique

The flooding smile technique‚ as described by Leil Lowndes‚ involves delaying your smile upon meeting someone. Instead of flashing an immediate grin‚ pause briefly‚ allowing your eyes to connect with theirs‚ and then let a warm‚ genuine smile spread across your face. This technique ensures that your smile feels more authentic and less like a reflex‚ making the recipient feel like they are the sole beneficiary of your pleasant expression. This slight delay makes a significant impact‚ creating a more positive and memorable first impression‚ conveying genuine warmth and interest.

The Sticky Eyes Technique

The sticky eyes technique‚ another powerful tool from “How to Talk to Anyone‚” focuses on maintaining consistent eye contact. Imagine your eyes are glued to your conversation partner’s‚ as if held by sticky‚ warm taffy. Avoid breaking eye contact even after they’ve finished speaking‚ allowing a few moments of sustained gaze. This technique conveys deep interest and attentiveness‚ making the other person feel truly heard and valued. It’s a subtle yet impactful way to build rapport and demonstrate that you are fully engaged in the interaction‚ strengthening the connection.

Mirroring and Matching Communication Style

Mirroring and matching involves subtly imitating your communication partner’s expressions‚ body language‚ pace‚ and tone. This technique fosters a sense of comfort and rapport by creating a subconscious connection. For instance‚ if someone speaks slowly and calmly‚ adjust your pace to match. If they use a lot of hand gestures‚ subtly incorporate some of your own. This mirroring effect makes the other person feel more understood and comfortable‚ as it signals that you’re in sync with them. It’s a powerful tool for building trust and creating more harmonious interactions.

The Briefcase Technique

The briefcase technique involves doing a little research on the person or group you’ll be interacting with. This could mean reading their publications‚ checking their social media profiles‚ or even just learning about their interests. By gathering this information‚ you equip yourself with relevant talking points and show that you’ve taken a genuine interest in them. This technique allows you to sound like an “insider‚” fostering an immediate connection by demonstrating you’ve done your homework. It’s a great way to make conversations feel more meaningful and engaging‚ moving beyond basic small talk.

Verbal Communication Strategies

Mastering verbal communication involves using effective conversation starters‚ active listening‚ and sharing relevant stories. These techniques help create engaging and meaningful interactions.

Conversation Starters

Initiating conversations‚ especially with strangers‚ can feel daunting. However‚ having a clear plan helps. Start by smiling and making immediate eye contact‚ signaling your openness. Avoid generic questions; instead‚ try observing something specific about their surroundings or mentioning a shared experience. Asking about their day or weekend plans‚ or if they’ve read any interesting books or articles can also be effective. Keep it light and avoid intense topics initially. The goal is to start a comfortable exchange that encourages natural flow of conversation.

Active Listening Skills

Active listening is crucial for meaningful conversations; it’s more than just hearing words. It involves fully concentrating‚ understanding‚ and responding thoughtfully to what’s being said. Demonstrate engagement by maintaining eye contact and using non-verbal cues like nodding. Avoid interrupting; instead‚ let them finish their thoughts. Reflect back what you’ve heard by summarizing or paraphrasing their points. Ask clarifying questions to show your interest and ensure mutual understanding. Active listening builds trust and rapport‚ transforming conversations into genuine connections.

Sharing Relevant Stories

Sharing relevant stories enhances conversations‚ making them more engaging and memorable. When sharing‚ aim for brevity and ensure the narrative aligns with the current topic. Avoid overpowering the conversation with lengthy personal anecdotes. Instead‚ try to match the tone and length of the other person’s stories. If they share a modest vacation tale‚ relate a similar experience of your own. Steer clear of one-upping or bragging‚ which can quickly derail the conversation. When done thoughtfully‚ sharing relevant stories creates a sense of shared experience and fosters deeper connections.

Non-Verbal Communication Strategies

Non-verbal cues are crucial for effective communication. Mastering eye contact‚ body language‚ posture‚ smiling‚ and nodding enhances your ability to connect and convey messages clearly.

The Power of Eye Contact

Eye contact is a potent tool in communication‚ signaling engagement and interest. Techniques like “sticky eyes‚” where you maintain eye contact even after someone has finished speaking‚ can create a deeper connection. However‚ it’s essential to avoid staring‚ which can be perceived as aggressive. Instead‚ aim for a comfortable‚ consistent gaze that shows you are truly present and listening. Effective eye contact fosters trust and rapport‚ making conversations more meaningful and impactful. It also demonstrates confidence and helps build stronger relationships by showing that you are paying attention to the other person.

Body Language and Posture

Your body language and posture speak volumes‚ often conveying more than words themselves. Open posture‚ such as relaxed shoulders and uncrossed arms‚ signals approachability and confidence. Conversely‚ closed-off stances can make you appear uninterested or defensive. Mirroring the other person’s posture subtly can build rapport‚ creating a sense of connection. Pay attention to your movements‚ ensuring they align with your message. Using gestures intentionally can emphasize points and make your communication more dynamic‚ enhancing engagement and understanding. Remember‚ mindful body language strengthens your message and fosters positive interactions.

Smiling and Nodding

Smiling and nodding are powerful non-verbal cues that significantly impact communication. A genuine smile can instantly make you appear more approachable and likable‚ fostering positive interactions. Nodding your head while someone is speaking demonstrates active listening and encourages them to continue‚ showing you are engaged and interested in what they have to say. However‚ it is important to use these cues authentically; forced smiles or excessive nodding can come across as insincere. Employ these techniques naturally to build rapport and create a more comfortable environment for open communication. When used effectively‚ smiling and nodding can transform how others perceive you.

Building Rapport and Connections

Building rapport involves creating a comfortable atmosphere. Using authentic compliments and making people feel good are key to forging deeper connections and more meaningful relationships.

Using Authentic Compliments

Offering genuine and specific compliments is a powerful way to build rapport. Instead of generic praise‚ focus on noticing and appreciating particular qualities or actions. This shows the other person that you are attentive and truly value them. A sincere compliment can make someone feel good‚ fostering a positive connection. When giving compliments‚ ensure they are appropriate for the context and avoid anything that could be misconstrued. The goal is to make them feel genuinely appreciated and comfortable‚ strengthening the bond between you.

Creating a Comfortable Atmosphere

Establishing a relaxed and comfortable environment is essential for effective communication. This can be achieved by being welcoming‚ approachable‚ and attentive to the other person’s needs. Start by using open body language‚ maintaining soft eye contact‚ and offering a genuine smile. Be mindful of your tone of voice‚ keeping it friendly and encouraging. It’s also vital to avoid any behaviors that might make the other person feel judged or uncomfortable. Focus on making them feel heard and valued‚ ensuring that they feel safe and at ease throughout the interaction. This will encourage open and honest dialogue.

Advanced Communication Skills

Moving beyond basic techniques‚ advanced skills involve adapting to various contexts and using techniques like the “Tombstone” to create lasting impressions and build powerful connections.

The Tombstone Technique

The Tombstone Technique‚ a concept from “How to Talk to Anyone‚” involves using specific‚ authentic compliments to build rapport and make a lasting positive impression. It is about crafting a memorable‚ positive statement‚ like an inscription on a tombstone‚ about the person you’re interacting with. This technique emphasizes the power of focused and genuine appreciation. The goal is to create a feeling of being truly seen and valued by offering unique observations that go beyond generic compliments. This method can strengthen connections and foster deeper relationships by showing you’ve paid close attention to the person and their attributes. It leaves a memorable positive impact.

Adapting to Different Contexts

Adapting your communication style to different contexts is crucial for effective interaction. Recognizing that a single approach won’t work in all situations is key. Factors like cultural background‚ professional setting‚ and personal relationship dynamics should influence how you communicate. Being mindful of the environment and tailoring your language‚ tone‚ and non-verbal cues accordingly demonstrates social intelligence. For instance‚ a casual conversation with a friend will differ greatly from a formal business meeting. Successful communicators can seamlessly adjust their methods to suit the specific demands of each interaction‚ ensuring their message is received positively and effectively. Flexibility is paramount.

Mastering communication techniques leads to stronger connections and greater social success. By practicing these skills‚ you can significantly improve your ability to talk to anyone.

The Benefits of Mastering Communication

Mastering communication offers significant advantages‚ enhancing your ability to connect with others and build strong relationships. Effective communication opens doors to career advancement‚ allowing you to network‚ collaborate‚ and lead teams more successfully. It boosts your confidence and makes you more approachable‚ leading to deeper personal connections. These skills help you navigate various social situations with ease‚ from casual conversations to more complex interactions. Furthermore‚ clear and effective communication reduces misunderstandings and conflicts‚ fostering better collaboration and harmony in all areas of life. Ultimately‚ improving your communication skills empowers you to achieve greater success and fulfillment‚ both personally and professionally.

mitsubishi heavy industries air conditioner user manual

Mitsubishi Heavy Industries air conditioner user manual provides information on installation and operation of air conditioners, including split system and variable frequency types, for optimal performance always.

Importance of Reading the Manual

Reading the Mitsubishi Heavy Industries air conditioner user manual is crucial for optimal performance and longevity of the unit. The manual provides essential information on installation, operation, and maintenance, helping users to avoid common mistakes. By following the guidelines outlined in the manual, users can ensure safe and efficient operation of their air conditioner. The manual also includes troubleshooting tips and guidelines for resolving common issues, which can help to reduce downtime and extend the lifespan of the unit. Furthermore, reading the manual can help users to understand the features and functions of their air conditioner, allowing them to use it more effectively and efficiently. Overall, reading the manual is an important step in getting the most out of a Mitsubishi Heavy Industries air conditioner. Proper use and maintenance can be achieved by reading the manual carefully.

Availability of Manuals

Mitsubishi Heavy Industries air conditioner user manuals are widely available online, making it easy for users to access and download them. The company’s official website provides a comprehensive database of user manuals, which can be searched by model number or product category. Additionally, websites such as ManualsLib offer a vast collection of Mitsubishi Heavy Industries user manuals, including those for air conditioners. Users can also contact the company’s customer support directly to request a manual or visit authorized dealerships for assistance. The manuals are typically available in multiple languages, catering to a global audience. With the manuals readily available, users can easily find the information they need to operate and maintain their air conditioners effectively, ensuring optimal performance and longevity of the unit, and making it a valuable resource for users.

Types of Mitsubishi Heavy Industries Air Conditioners

Mitsubishi Heavy Industries offers split system and variable frequency air conditioners for efficient cooling always.

Split System Heat Pump Type

The split system heat pump type air conditioner is a popular choice for its energy efficiency and versatility. This type of air conditioner consists of an outdoor unit and an indoor unit, connected by refrigerant pipes. The outdoor unit contains the compressor and fan, while the indoor unit contains the evaporator and fan. The split system heat pump type air conditioner is suitable for a wide range of applications, from residential to commercial use. It is also known for its quiet operation and compact design, making it a great option for homes and offices. Additionally, this type of air conditioner is easy to install and maintain, with a user-friendly interface and adjustable settings. Overall, the split system heat pump type air conditioner is a reliable and efficient choice for heating and cooling needs. Mitsubishi Heavy Industries offers various models of this type.

Variable Frequency Wall Mounted Type

The variable frequency wall mounted type air conditioner is a highly efficient and compact solution for cooling and heating needs. This type of air conditioner uses a variable frequency drive to adjust the compressor speed, resulting in significant energy savings. The wall mounted design makes it easy to install and maintain, with a sleek and modern appearance that fits well with any decor. Mitsubishi Heavy Industries offers a range of models with advanced features such as automatic temperature control and air purification systems. The variable frequency wall mounted type air conditioner is also known for its quiet operation and low vibration, making it suitable for residential and commercial use. With! its advanced technology and user-friendly interface, this type of air conditioner provides a comfortable and healthy indoor environment. Mitsubishi Heavy Industries variable frequency wall mounted type air conditioners are reliable and efficient choices.

Mitsubishi Heavy Industries Air Conditioner Models

Mitsubishi Heavy Industries offers various air conditioner models with advanced features always available online.

SRK20MA-S and SRC20MA-S Models

The SRK20MA-S and SRC20MA-S models are part of the Mitsubishi Heavy Industries air conditioner lineup, offering efficient cooling and heating solutions. These models are designed to provide optimal performance and energy savings. The SRK20MA-S is a split system heat pump type, while the SRC20MA-S is a variable frequency wall mounted type. Both models use R410A refrigerant, which is environmentally friendly. The user manual for these models provides detailed information on installation, operation, and maintenance. It is essential to read and follow the manual carefully to ensure proper use and troubleshooting. The manual is available online and can be downloaded for future reference. By following the guidelines outlined in the manual, users can enjoy efficient and reliable cooling and heating with their SRK20MA-S and SRC20MA-S models. The models are designed for residential and commercial use, providing a comfortable indoor climate.

SRK25MA-S and SRC25MA-S Models

The SRK25MA-S and SRC25MA-S models are high-performance air conditioners from Mitsubishi Heavy Industries, designed to provide efficient cooling and heating. These models feature advanced technologies, including variable frequency control and inverter-driven compressors; The SRK25MA-S is a split system heat pump type, while the SRC25MA-S is a variable frequency wall mounted type. Both models are designed to minimize energy consumption and reduce environmental impact. The user manual for these models provides detailed information on installation, operation, and maintenance, ensuring optimal performance and longevity. With their high cooling and heating capacities, the SRK25MA-S and SRC25MA-S models are suitable for large residential and commercial spaces, providing a comfortable indoor climate and reliable operation. The models are also equipped with advanced features, such as automatic temperature control and air purification systems.

Technical Manual Information

Mitsubishi Heavy Industries air conditioner technical manuals contain detailed specifications always.

Manual Number and Contents

Mitsubishi Heavy Industries air conditioner user manual has a specific manual number, such as 2011 No. W1-01, which contains detailed information on the air conditioner’s operation and maintenance. The manual includes a table of contents, which lists the various sections and subsections, making it easy to navigate and find specific information. The contents of the manual cover topics such as general information, installation, operation, and troubleshooting, providing users with a comprehensive guide to their air conditioner. By referencing the manual number and contents, users can quickly locate the information they need to ensure optimal performance and longevity of their air conditioner. The manual is an essential resource for anyone who owns a Mitsubishi Heavy Industries air conditioner, and it is recommended that users read and follow the instructions carefully. The manual is available online or with the purchase of the air conditioner.

Refrigerant Used in Air Conditioners

The Mitsubishi Heavy Industries air conditioner user manual specifies the type of refrigerant used in their air conditioners, which is R410A. This refrigerant is a hydrofluorocarbon that is commonly used in air conditioning systems due to its high performance and environmental benefits. The manual provides information on the handling and disposal of the refrigerant, as well as safety precautions to take when working with it. The use of R410A refrigerant in Mitsubishi Heavy Industries air conditioners ensures efficient and reliable cooling, while also minimizing the risk of environmental harm. The manual’s guidance on refrigerant use and handling is an important resource for users, helping them to ensure safe and proper operation of their air conditioner. Proper handling of the refrigerant is crucial to maintain the air conditioner’s performance and longevity;

and Final Thoughts

Mitsubishi Heavy Industries air conditioner user manual is a valuable resource for optimal performance and maintenance always and forever online.

Storing the User Manual for Future Reference

To ensure easy access to the user manual, it is recommended to store it in a safe and dry place, such as a filing cabinet or a designated drawer. This will help prevent damage or loss of the manual, and allow for quick reference in case of any questions or issues with the air conditioner. Additionally, it is a good idea to keep a digital copy of the manual, such as a PDF file, on a computer or mobile device, to provide an extra layer of convenience and accessibility. By storing the user manual properly, users can ensure that they have access to important information and guidance, and can get the most out of their Mitsubishi Heavy Industries air conditioner. Proper storage is essential for maintaining the manual’s integrity and usefulness over time, and for ensuring optimal performance.