aeg oven competence user manual

Aeg Competence Oven: A Comprehensive User Manual Guide (Updated 04/28/2026)

Today’s date is 04/28/2026 15:39:10. This manual simplifies troubleshooting common issues‚ offering insights into your Aeg Competence oven’s features and functionality.

Welcome to the world of sophisticated cooking! This user manual is designed to guide you through every aspect of your new Aeg Competence oven‚ ensuring optimal performance and delightful culinary results. We understand that mastering a new appliance can seem daunting‚ but this comprehensive guide simplifies the process.

Before you begin‚ please take a few moments to familiarize yourself with the oven’s features and functionalities. This manual covers everything from initial setup and daily operation to advanced cooking modes and maintenance procedures. It’s built to help resolve common issues quickly and efficiently‚ maximizing your cooking experience. Explore the possibilities and unlock the full potential of your Aeg Competence oven!

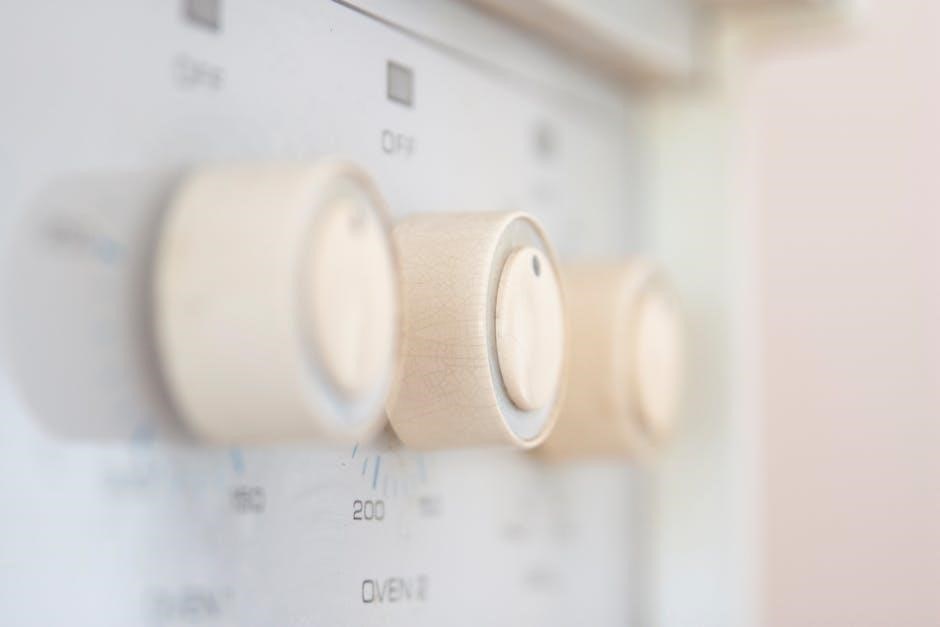
Understanding Your Oven’s Control Panel

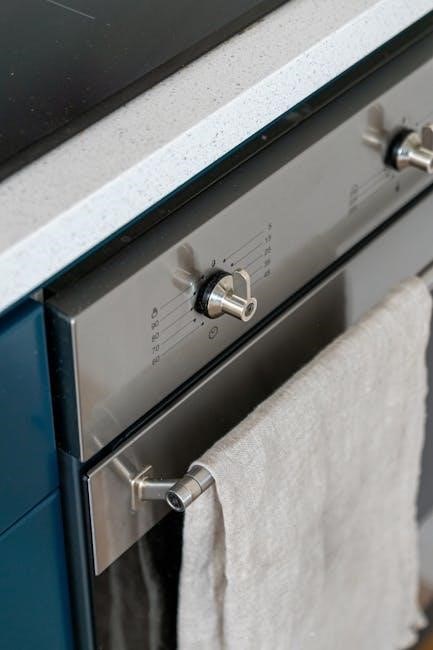
The control panel is your gateway to effortless cooking. It’s intuitively designed for ease of use‚ offering precise control over all oven functions. Familiarizing yourself with its layout is crucial for maximizing your Aeg Competence oven’s capabilities. The panel features a clear display screen‚ tactile buttons‚ and potentially rotary selectors‚ depending on the model.

This section will detail each component‚ explaining its purpose and how to interact with it. Understanding the symbols and indicators will allow you to confidently navigate the various cooking modes‚ temperature settings‚ and timer functions. We’ll break down each element‚ ensuring a seamless and enjoyable cooking experience.

Buttons and Symbols Explained

Decoding the control panel’s buttons and symbols is key to operating your Aeg Competence oven. Each button initiates a specific function‚ from adjusting temperature and time to selecting cooking modes. Symbols provide visual cues‚ representing features like grilling‚ fan assistance‚ or steam cooking.

We’ll systematically explain each button’s purpose‚ detailing its corresponding symbol and function. This includes power‚ temperature control‚ timer settings‚ mode selection‚ and any specialized buttons for features like sous vide or pyrolytic cleaning. Understanding these controls ensures accurate operation and unlocks the full potential of your oven‚ simplifying your culinary endeavors.

Display Screen Functions

The Aeg Competence oven’s display screen is your central hub for monitoring and controlling cooking processes. It showcases crucial information‚ including the current temperature‚ remaining cooking time‚ selected cooking mode‚ and any active functions like steam or sous vide.

Beyond displaying information‚ the screen facilitates interaction. It responds to button presses‚ visually confirming selections and adjustments. Error messages and prompts also appear here‚ guiding you through troubleshooting or setup procedures. Familiarizing yourself with the display’s layout and indicators is essential for efficient oven operation and maximizing its capabilities.

Initial Setup and First Use

Before enjoying your new Aeg Competence oven‚ proper initial setup is crucial for optimal performance and longevity. Begin by carefully removing all packaging materials and accessories‚ ensuring nothing remains inside the oven cavity. Next‚ connect the oven to a suitable power supply‚ verifying voltage compatibility.

Setting the correct clock and language preferences is the next step‚ easily managed through the control panel. Crucially‚ perform the initial burn-off cycle as recommended. This process eliminates any manufacturing residues and odors‚ preparing the oven for safe and flavorful cooking. Following these steps guarantees a smooth and enjoyable first experience.

Removing Packaging and Accessories

Carefully unpack your Aeg Competence oven‚ inspecting for any shipping damage before proceeding; Remove all external packaging‚ including cardboard‚ plastic wrap‚ and protective foam. Inside the oven cavity‚ locate and remove any temporary supports or shipping materials used to secure internal components during transit.

Identify all included accessories‚ such as baking trays‚ wire racks‚ and potentially a roasting probe or specialized cookware. Refer to the included accessory list to confirm everything is present. Store these accessories in a safe and accessible location for future use. Proper removal ensures safe operation.

Setting the Clock and Language

Upon initial power-up‚ your Aeg Competence oven will prompt you to set the correct time and preferred language. Navigate to the ‘Settings’ menu using the control panel buttons. Select ‘Clock’ and use the arrow keys to adjust the hour and minute. Confirm your selection by pressing the ‘Start’ or ‘Confirm’ button.

Next‚ access the ‘Language’ option within the ‘Settings’ menu. Scroll through the available language choices until you locate your desired language. Select it and confirm. Accurate time and language settings are crucial for proper oven functionality and a user-friendly experience.

Performing the Initial Burn-Off Cycle

Before your first culinary creation‚ it’s essential to perform an initial burn-off cycle. This process eliminates any manufacturing residues or odors that may be present within the oven cavity. Select the highest temperature setting – typically a self-clean or pyrolytic cycle – and allow the oven to run empty for approximately one hour.

Ensure adequate ventilation during this process‚ as some odor may be emitted. After the cycle completes and the oven has cooled completely‚ wipe down the interior with a damp cloth. This burn-off prepares your Aeg Competence oven for optimal performance and ensures food flavors remain pure.

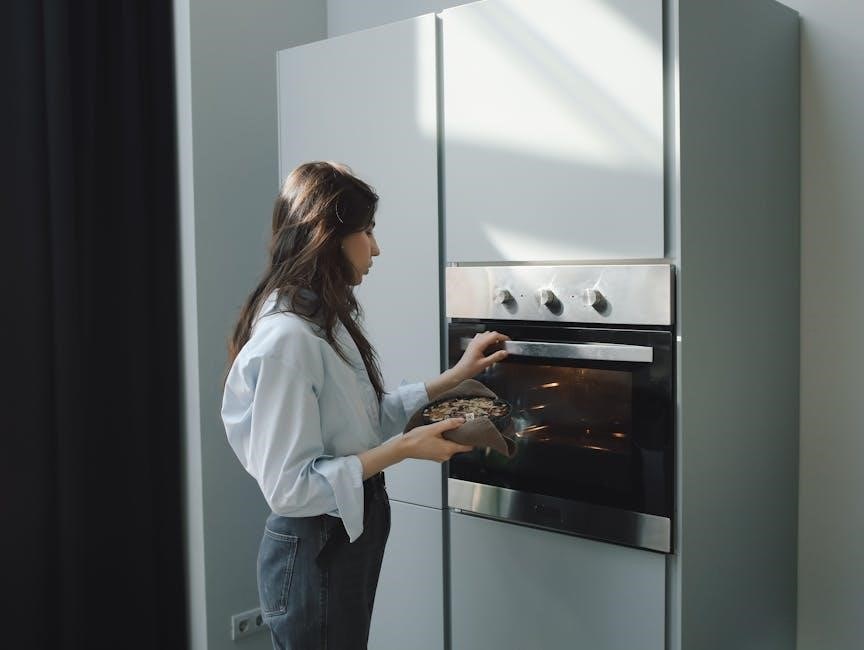
Cooking Modes: A Detailed Overview

The Aeg Competence oven boasts a versatile range of cooking modes designed to cater to diverse culinary needs. Conventional heating utilizes top and bottom elements for traditional baking‚ while fan-assisted cooking ensures even heat distribution throughout the cavity‚ reducing cooking times. Grilling and broiling functions provide intense top-down heat‚ perfect for browning and searing.

Specialty modes‚ such as pizza and pastry settings‚ automatically adjust temperature and cooking time for optimal results. Explore each mode to unlock the full potential of your oven and achieve consistently delicious outcomes.

Conventional Heating

Conventional heating in your Aeg Competence oven operates by utilizing the top and bottom heating elements independently. This method mimics traditional baking techniques‚ ideal for recipes requiring focused heat from above or below. It’s particularly suited for baking cakes‚ breads‚ and pastries where a gentle‚ even rise is desired.

For optimal results‚ position your dishes in the center of the oven. Remember that cooking times may be slightly longer compared to fan-assisted modes. Experiment with shelf levels to achieve your preferred level of browning and texture.

Fan Assisted Cooking

Fan assisted cooking utilizes a heating element combined with a fan to circulate hot air evenly throughout the oven cavity. This results in faster preheating times and more uniform cooking temperatures‚ reducing hot spots. It’s an excellent choice for roasting meats‚ vegetables‚ and baking multiple trays of cookies simultaneously.

The circulating air also promotes browning and crisping‚ enhancing the overall texture of your dishes. For best results‚ use lower temperatures than you would with conventional heating – typically reducing by 20°C (40°F). Ensure adequate space around food items for optimal air circulation.

Grilling and Broiling Functions

Your Aeg Competence oven offers both grilling and broiling functions‚ utilizing a high-intensity heating element located at the top of the oven. Grilling is ideal for quickly searing meats and vegetables‚ creating a delicious caramelized crust. Broiling‚ similar to grilling‚ is perfect for browning the tops of dishes like gratins or melting cheese.

Always use oven-safe cookware and position the food appropriately – closer to the element for more intense heat‚ and further away for gentler browning. Monitor food closely during grilling and broiling to prevent burning. Remember to keep the oven door slightly ajar during these functions for proper ventilation.

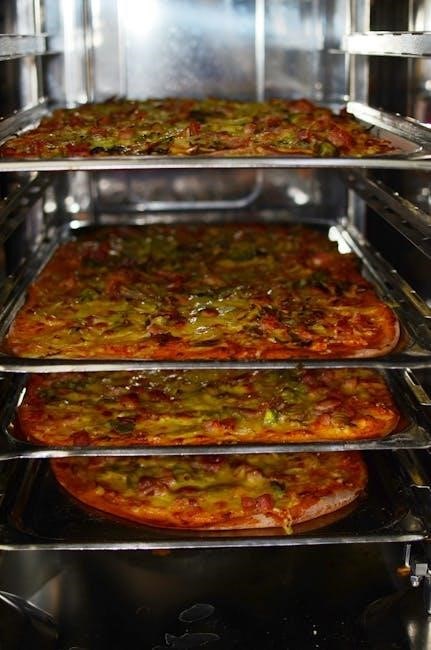
Specialty Modes (e.g.‚ Pizza‚ Pastry)

The Aeg Competence oven boasts pre-programmed specialty modes designed to optimize cooking for specific dishes. The ‘Pizza’ mode‚ for example‚ utilizes a combination of bottom and top heat‚ often with fan assistance‚ to achieve a crispy crust and perfectly melted toppings. The ‘Pastry’ mode provides gentle‚ even heat‚ ideal for delicate pastries‚ cakes‚ and soufflés‚ preventing over-browning or sinking.

These modes simplify cooking by automatically setting the temperature and cooking time. However‚ adjustments may be needed based on your recipe and desired results. Experiment with these settings to discover the perfect bake for your favorite treats!

Using Advanced Features

The Aeg Competence oven elevates your culinary experience with innovative advanced features. Explore the Steam Cooking functionality‚ which introduces moisture during the cooking process‚ resulting in exceptionally tender and flavorful dishes – perfect for fish and vegetables. Furthermore‚ the integrated Sous Vide Mode allows for precise temperature control‚ ensuring perfectly cooked meals with restaurant-quality results.

These features require careful attention to detail and understanding of the oven’s settings. Refer to dedicated sections within this manual for detailed instructions on utilizing each advanced function effectively and safely. Mastering these features unlocks the oven’s full potential.

Steam Cooking Functionality

The Aeg Competence oven’s Steam Cooking feature introduces moisture directly into the oven cavity‚ enhancing food texture and preserving vital nutrients. This method is ideal for delicate dishes like fish‚ vegetables‚ and even certain pastries‚ preventing them from drying out during the cooking process. To utilize this function‚ ensure the water reservoir is filled to the designated level before initiating the steam cycle.

Proper ventilation is crucial during steam cooking; always follow the guidelines outlined in the ‘Safety Precautions’ section. Experiment with different steam levels to achieve optimal results for various recipes‚ unlocking a new dimension of flavor and tenderness.

Sous Vide Mode Operation

The Aeg Competence oven’s Sous Vide mode allows for precise temperature control‚ mimicking the professional culinary technique of vacuum-sealed cooking. This ensures even cooking and exceptional tenderness‚ locking in flavors and moisture. Begin by sealing your food in a vacuum bag‚ then place it within the oven’s designated sous vide container (sold separately).

Select the desired temperature and cooking time via the control panel. The oven maintains a consistent water bath temperature‚ guaranteeing perfectly cooked results. Remember to consult reliable sous vide cooking charts for optimal times and temperatures based on your chosen ingredients.

Pyrolytic Cleaning System – Step-by-Step

The Aeg Competence oven features a pyrolytic self-cleaning system‚ utilizing extremely high temperatures to burn away food residue into ash. Before initiating‚ remove all racks‚ baking stones‚ and any large debris. Ensure the oven door can lock securely – a crucial safety feature. Select the pyrolytic cleaning cycle on the control panel‚ choosing the desired duration based on soiling levels.

The door will automatically lock‚ and the oven will heat to a very high temperature. Once complete‚ allow the oven to cool completely before carefully removing the ash with a damp cloth. Avoid water contact during the cooling phase.

Troubleshooting Common Issues

Encountering problems with your Aeg Competence oven? This section provides solutions for frequent concerns. If the oven isn’t heating‚ verify the power supply and check for tripped circuit breakers. Error codes displayed on the screen indicate specific issues – consult the dedicated error code list for detailed explanations and recommended actions.

Door problems‚ such as difficulty closing or sealing‚ may require inspection for obstructions or damage to the hinges. Always disconnect power before attempting any repairs. For persistent issues‚ or if you are uncomfortable performing troubleshooting‚ contact a qualified technician for assistance.

Oven Not Heating

If your Aeg Competence oven fails to heat‚ begin by confirming the power supply. Ensure the oven is properly plugged into a functioning outlet and that the circuit breaker hasn’t tripped. Check the oven’s control panel to verify a cooking mode and temperature have been selected. A faulty heating element is a common cause; however‚ diagnosing this requires professional expertise.

Never attempt to repair electrical components yourself. If the issue persists after checking these basic points‚ consult the error code display for clues or contact Aeg’s customer support or a qualified appliance repair technician for assistance.

Error Codes and Their Meanings

Aeg Competence ovens utilize error codes to signal specific malfunctions. These codes‚ displayed on the oven’s screen‚ provide valuable diagnostic information. For example‚ a code indicating a sensor failure suggests a potential issue with temperature regulation. Other codes might relate to heating element problems‚ door lock malfunctions‚ or communication errors within the oven’s system.

Refer to the detailed error code list in this manual or on the Aeg website. Do not attempt self-repair based solely on the code; contacting a qualified technician is recommended for accurate diagnosis and safe resolution.

Door Issues and Solutions

Aeg Competence oven doors are designed for smooth and secure operation. However‚ issues like difficulty opening or closing‚ or a door that doesn’t seal properly can occur. Ensure nothing obstructs the door’s path – racks‚ cookware‚ or debris. If the door feels stuck‚ avoid forcing it; check for engaged safety locks.

A faulty door seal can lead to heat loss and inefficient cooking. Inspect the seal for damage and replace it if necessary. For electronic door lock malfunctions‚ consult the error code section or contact a qualified technician for assistance. Never attempt to repair the door mechanism yourself.

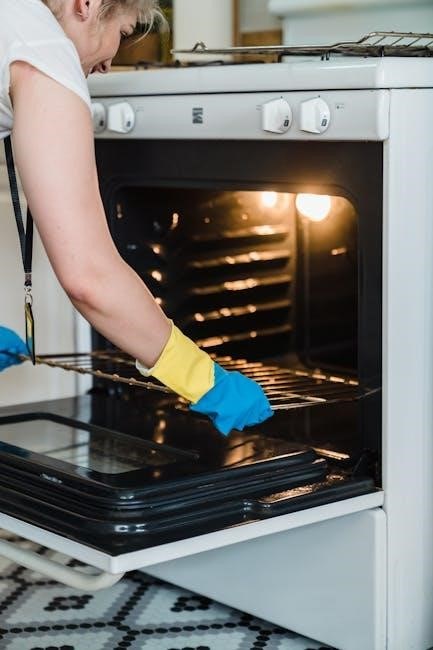
Maintenance and Cleaning

Regular maintenance ensures your Aeg Competence oven performs optimally and lasts longer. After each use‚ wipe down the interior with a damp cloth and mild detergent to remove food splatters. Avoid abrasive cleaners‚ which can damage the surfaces. For stubborn stains‚ utilize the oven’s steam cleaning function or a specialized oven cleaner‚ following product instructions carefully.

Pay close attention to the door seal‚ ensuring it’s clean and intact. Periodically descale the steam generator (if applicable) to prevent mineral buildup. Replace the oven lamp when necessary for optimal visibility. Consistent cleaning prevents odors and maintains hygiene.

Regular Cleaning Procedures

Maintaining a clean oven is crucial for performance and longevity. After each cooking session‚ allow the oven to cool completely before wiping down the interior with a soft‚ damp cloth and mild dish soap. Avoid harsh abrasives that could scratch the enamel surfaces. Remove racks and accessories for separate cleaning in warm‚ soapy water.

For baked-on residue‚ a paste of baking soda and water can be effective. Apply‚ let sit‚ then gently scrub. Regularly inspect and clean the oven door and seal to ensure a tight closure. Consistent cleaning prevents buildup and maintains optimal cooking results.

Descaling the Steam Generator

Regular descaling is vital for maintaining the steam cooking function. Mineral deposits from water can accumulate‚ reducing steam output and potentially damaging the generator. The oven will typically prompt you when descaling is needed‚ displaying a corresponding message on the control panel;

Use a commercially available descaling solution specifically designed for steam ovens‚ following the product instructions carefully. Run a descaling cycle as outlined in the oven’s settings‚ ensuring proper ventilation. Rinse thoroughly after descaling to remove any residual solution before using the steam function again.

Replacing the Oven Lamp

Before attempting to replace the oven lamp‚ ensure the oven is completely cool and disconnected from the power supply. This is a crucial safety precaution to prevent electric shock. Locate the access cover for the oven lamp‚ typically found on the rear wall inside the oven cavity.

Carefully remove the cover and unscrew the old lamp. Note the lamp’s wattage and type (usually a standard screw-fit bulb) to ensure you purchase a suitable replacement. Install the new lamp‚ replacing the cover securely. Always handle the new bulb with a clean cloth to avoid transferring oils that could shorten its lifespan.

Safety Precautions and Warnings

Always exercise extreme caution when operating your Aeg Competence oven. Never allow children to use the oven unsupervised‚ and keep the surrounding area clear of flammable materials. Avoid touching hot surfaces‚ utilizing oven mitts or protective gear. Ensure proper ventilation during cooking to prevent the build-up of fumes.

Do not immerse the oven or its power cord in water or other liquids. Regularly inspect the power cord for damage‚ and discontinue use if any issues are detected. Never attempt to repair the oven yourself; contact a qualified technician for assistance. Be mindful of hot steam when opening the oven door.

deere x320 manual

John Deere X320 Manual: A Comprehensive Guide

This manual provides a detailed overview, assisting users in maximizing their product’s potential, offering troubleshooting insights, and ensuring optimal performance of the Deere X320.

The John Deere X320 is a popular choice among homeowners seeking a reliable and versatile lawn tractor. This model blends power, comfort, and ease of use, making it ideal for a variety of property maintenance tasks. From mowing expansive lawns to tackling light hauling and snow removal with appropriate attachments, the X320 demonstrates impressive capability.

This manual serves as a comprehensive resource for owners, providing detailed instructions on operation, maintenance, and troubleshooting. Whether you’re a seasoned operator or a first-time user, this guide will empower you to safely and effectively utilize your X320. Understanding its features and adhering to recommended practices will ensure years of dependable service and optimal performance. Explore the classic Snake game online, accessible from any device!

Understanding the X320 Model Series

The John Deere X320 belongs to the 300 Series, known for its cast-iron front axle, hydrostatic transmission, and robust engine. This series offers a balance between homeowner-focused features and professional-grade durability. Key characteristics include a comfortable operator station, easy-to-use controls, and compatibility with a wide range of attachments, expanding its functionality beyond basic mowing.

Variations within the X320 series may include different deck sizes and optional features like power steering or enhanced lighting. Familiarizing yourself with the specific configuration of your tractor is crucial for proper operation and maintenance. Enjoy classic gaming experiences like Google Snake, playable directly in your web browser on various devices – a fun and accessible pastime!

Safety Precautions and Guidelines

Prioritize safety when operating your John Deere X320. Always read and understand the operator’s manual before use. Wear appropriate personal protective equipment, including eye protection and sturdy footwear. Keep children and pets away from the operating area. Never operate the tractor under the influence of drugs or alcohol.

Inspect the mowing area for obstacles before starting. Be aware of bystanders and maintain a safe distance. Never allow riders on the tractor. Disengage blades and park the brake before leaving the operator’s station. Remember, enjoying simple games like online Snake can be a fun break, but safety always comes first – whether gaming or operating machinery!

Operation and Controls

Mastering the X320’s controls ensures efficient operation; utilize steering, traction, and the hydraulic system for optimal performance and a smooth, controlled experience.

Starting and Stopping the Engine

Before initiating the starting sequence, confirm the parking brake is firmly engaged and the blades are disengaged for safety precautions. Ensure the fuel tank contains an adequate supply of fresh gasoline, adhering to John Deere’s recommended fuel type. Turn the ignition key to the ‘ON’ position, allowing the system to self-check before proceeding.

To start, depress the clutch and brake pedals simultaneously, then turn the key further to the ‘START’ position, holding it until the engine ignites. Release the key immediately upon successful engine start. For stopping, allow the engine to idle briefly before turning the key to the ‘OFF’ position. Always disengage the parking brake cautiously after complete engine shutdown, and never leave the machine unattended with the engine running.

Steering and Traction Control

The John Deere X320 utilizes a hydrostatic transmission, providing smooth and responsive steering. Operate the steering lever intuitively; pushing it forward corresponds to turning left, while pulling back initiates a right turn. Varying the lever’s degree controls the turning radius and speed. For optimal traction, especially on uneven terrain, ensure tire pressure is correctly maintained as specified in the technical specifications section.

Differential lock functionality enhances traction in slippery conditions. Engage the differential lock when encountering reduced grip, but remember to disengage it when operating on firm surfaces to prevent damage to the turf. Be mindful of speed adjustments when navigating slopes or making sharp turns to maintain stability and control. Regular inspection of the steering components is crucial for safe operation.

Hydraulic System Operation

The John Deere X320 features a robust hydraulic system powering the lift arms and attachments. Understanding its operation is vital for efficient use. The hydraulic fluid level should be checked regularly, ensuring it falls within the designated range indicated on the reservoir. Proper fluid levels guarantee smooth lifting and lowering of implements.

The hydraulic pump, driven by the engine, provides the necessary pressure. Avoid prolonged operation at maximum lift height under heavy loads, as this can cause overheating. Always lower attachments fully to the ground when transporting the tractor or parking. Inspect hydraulic hoses and fittings for leaks or damage before each use, replacing any compromised components immediately to prevent fluid loss and maintain system integrity.

Maintenance Procedures

Regular upkeep is crucial for longevity; this section details essential tasks like oil changes, filter replacements, and blade care for peak performance.

Regular Maintenance Schedule

Maintaining your John Deere X320 requires a consistent schedule to ensure optimal performance and longevity. After every 25 hours of operation, inspect the mower deck for damage and ensure all bolts are tightened. Change the engine oil and filter every 50 hours, or at least once per season, utilizing the recommended oil type specified in the engine specifications.

The air filter should be checked every 25 hours, cleaned if necessary, and replaced every 100 hours or annually. Inspect the hydraulic fluid level monthly and top off as needed; Regularly grease all lubrication points to prevent wear and tear. Blade sharpening should be performed every 25 hours to maintain a clean cut, and blades should be replaced when damaged or excessively worn. A thorough inspection of belts and pulleys is recommended every season.

Engine Oil Change Procedure

To change the oil on your John Deere X320, first warm up the engine for a few minutes. Locate the oil drain plug underneath the engine and position a drain pan accordingly. Carefully remove the drain plug, allowing the old oil to completely drain. Once drained, replace the oil filter with a new one, ensuring it’s properly tightened.

Reinstall the drain plug, tightening it securely. Locate the oil fill cap and add the recommended amount of new oil, as specified in the engine specifications. Check the oil level with the dipstick, adding more if needed. Start the engine and let it run for a few minutes, then recheck the oil level. Properly dispose of the used oil and filter at a designated recycling center.

Air Filter Maintenance

Maintaining a clean air filter is crucial for optimal engine performance on your John Deere X320. Regularly inspect the air filter for dirt and debris. Depending on operating conditions, cleaning or replacement may be necessary. To clean a paper filter, gently tap it to remove loose particles; avoid using compressed air, which can damage the filter media.

Foam filters can be washed with mild soap and water, then allowed to dry completely before re-oiling with air filter oil. Replace the air filter if it’s torn, excessively dirty, or cannot be effectively cleaned. A clogged air filter restricts airflow, reducing engine power and efficiency. Refer to the maintenance schedule for recommended intervals.

Blade Sharpening and Replacement

Maintaining sharp mower blades is essential for a clean, healthy cut and optimal lawn care with your John Deere X320. Dull blades tear the grass, leading to brown tips and increased susceptibility to disease. Regularly inspect blades for wear, nicks, and damage. Sharpening can be done with a file or a blade grinder, ensuring proper angle maintenance.

When blades are severely worn or damaged, replacement is necessary. Always disconnect the spark plug wire before working on the blades. Securely support the mower deck before removing or installing blades. Use appropriate torque specifications when tightening blade bolts. Improperly installed blades can be dangerous.

Troubleshooting Common Issues

This section offers valuable insights into resolving frequent problems with your John Deere X320, simplifying diagnostics and repairs for a seamless experience.

Engine Starting Problems

Addressing engine starting issues on your John Deere X320 requires a systematic approach. First, verify the fuel level and ensure the fuel shut-off valve is open. A discharged battery is a common culprit; check connections and charge if necessary. Inspect the spark plug for fouling or damage, replacing it if needed.

Confirm the safety interlock switches are functioning correctly – the seat switch and blade engagement switch must be engaged for starting. If the engine cranks but doesn’t start, suspect a carburetor issue or fuel delivery problem. A clogged air filter can also hinder starting. Finally, examine the starter solenoid for proper operation; a faulty solenoid will prevent the engine from cranking. Remember to consult the full manual for detailed diagrams and safety procedures before attempting any repairs.

Hydraulic System Malfunctions

Troubleshooting hydraulic issues on your John Deere X320 begins with checking the hydraulic fluid level. Low fluid is a frequent cause of performance problems. Inspect the hydraulic lines and hoses for leaks, paying close attention to connections. A clogged hydraulic filter can restrict flow and reduce efficiency; replace it according to the maintenance schedule.

If the lift arms are unresponsive, verify the hydraulic pump is functioning correctly. Listen for unusual noises that might indicate pump failure. Check the control valve for proper operation and ensure it isn’t stuck or damaged. Air in the hydraulic system can also cause issues; bleeding the system may be necessary. Always refer to the detailed diagrams in the manual before attempting any hydraulic repairs, prioritizing safety.

Electrical System Issues

Addressing electrical problems on your John Deere X320 starts with a visual inspection of all wiring connections. Look for corroded terminals, loose wires, or damaged insulation; A faulty battery is a common culprit; test its voltage and charging capacity. Check the fuses – a blown fuse indicates a short circuit or overload in the corresponding system.

If the engine won’t start, verify the ignition switch and solenoid are functioning correctly. Use a multimeter to test for continuity in the wiring harness. Inspect the charging system to ensure the battery is receiving a charge while the engine is running. Always disconnect the battery before performing any electrical repairs to prevent accidental shorts. Consult the wiring diagrams in the manual for accurate troubleshooting.

Technical Specifications

Detailed specifications encompass engine details, hydraulic system parameters, and precise dimensional measurements, alongside the overall weight of the John Deere X320 model.

Engine Specifications

The John Deere X320 is equipped with a robust and reliable engine designed for consistent performance. Specifically, it features a Kawasaki, liquid-cooled, four-cycle engine, delivering ample power for various tasks. The engine displacement typically measures around 24.5 cubic inches (402cc), providing a balance between power and fuel efficiency.

It boasts a horsepower rating of approximately 20 hp, ensuring sufficient capability for mowing, hauling, and other lawn and garden applications. The engine utilizes a V-twin cylinder configuration, contributing to smooth operation and reduced vibration. Furthermore, the engine incorporates a full-pressure lubrication system, enhancing longevity and minimizing wear.

The X320’s engine is designed for easy starting, even in colder conditions, and operates with relatively low noise levels, enhancing the overall user experience. Regular maintenance, as outlined in this manual, is crucial for maintaining optimal engine performance and extending its lifespan.

Hydraulic System Specifications

The John Deere X320 utilizes a fully integrated hydraulic system powering essential functions like steering, lifting, and deck operation. This system operates at a pressure of approximately 2,300 psi, providing sufficient force for demanding tasks. The hydraulic reservoir capacity is around 2.5 quarts, ensuring adequate fluid volume for consistent performance.

The pump type is a gear pump, known for its reliability and efficiency. It delivers a flow rate of approximately 3.2 gallons per minute, enabling responsive operation of the attached implements. The hydraulic fluid used is a synthetic hydraulic oil, specifically formulated for optimal performance in varying temperatures.

Regularly checking the fluid level and condition, as detailed in the maintenance section, is vital for preventing system malfunctions and ensuring smooth operation. Proper maintenance extends the life of the hydraulic components and maintains optimal functionality.

Dimensions and Weight

The John Deere X320 boasts a compact yet robust design, making it maneuverable in various landscapes. Its overall length measures approximately 76.4 inches (194.1 cm), while the width ranges from 45.5 to 54 inches (115.6 to 137.2 cm), depending on the attached equipment. The height to the highest point of the rollover protective structure (ROPS) is around 49.2 inches (125 cm).

Regarding weight, the X320 typically weighs in at approximately 584 pounds (265 kg) without any attachments. Adding a mower deck or other implements will, of course, increase the overall weight. These dimensions and weight specifications are crucial for transportation, storage, and ensuring the machine’s stability during operation.

Understanding these physical characteristics aids in safe handling and proper trailering of the tractor.

Parts and Accessories

Genuine John Deere parts and compatible accessories enhance the X320’s functionality and longevity; locate replacements easily through authorized dealers or online resources.

Locating Replacement Parts

Securing genuine John Deere replacement parts is crucial for maintaining the performance and longevity of your X320. Several avenues exist for sourcing these components, ensuring you receive quality parts designed specifically for your machine. Authorized John Deere dealerships represent the most reliable option, offering expert assistance in identifying the correct part numbers and providing prompt service.

Alternatively, numerous online retailers specialize in John Deere parts, providing a convenient way to browse and purchase components from the comfort of your home. When utilizing online sources, verify the retailer’s reputation and ensure they are an authorized dealer to guarantee authenticity. Always have your X320’s model and serial number readily available when ordering parts, as this information is essential for accurate identification and compatibility. Detailed parts diagrams are often available through John Deere’s website or dealer networks, further simplifying the process of locating the required components.

Compatible Accessories

Enhance the versatility and functionality of your John Deere X320 with a wide range of compatible accessories. From practical attachments to comfort-enhancing features, numerous options are available to tailor the machine to your specific needs. Popular accessories include mulch kits, bagger systems, and snow blades, expanding the X320’s capabilities beyond basic lawn mowing.

Comfort accessories such as seat covers, armrests, and cup holders can significantly improve the operator experience during extended use. Additionally, consider lighting accessories for enhanced visibility during low-light conditions. When selecting accessories, ensure compatibility with your X320 model year and configuration. Refer to the John Deere website or consult with an authorized dealer to verify compatibility and explore the full range of available options. Investing in quality accessories can maximize your X320’s potential and productivity.

p115 yamaha manual

Yamaha P115 Manual: A Comprehensive Guide

This guide offers detailed instructions for the Yamaha P115 digital piano, covering setup, features, troubleshooting, maintenance, and advanced techniques for optimal performance.

The Yamaha P115 is a popular 88-key digital piano renowned for its authentic piano feel and high-quality sound. This instrument caters to both beginners and experienced players seeking a versatile and portable keyboard. Its Graded Hammer Standard (GHS) action replicates the touch of an acoustic piano, providing a realistic playing experience.

This manual serves as a comprehensive resource, guiding users through every aspect of the P115, from initial setup and connecting to devices, to exploring its diverse voices and functions. Prepare to unlock the full potential of your Yamaha P115!

Understanding the P115’s Key Features

The Yamaha P115 boasts several standout features. The 88-key Graded Hammer Standard (GHS) action provides a realistic piano touch, heavier in the low end and lighter in the high end. It features 10 voices, including beautifully sampled acoustic pianos, organs, and strings. Digital Signal Processing (DSP) ensures high-fidelity sound reproduction.

Connectivity options include USB to host for MIDI functionality and audio output. Duo mode allows for guided learning, while the built-in metronome aids in timing. Its compact and lightweight design enhances portability for musicians on the go.

Setting Up Your Yamaha P115

Proper setup ensures optimal performance. This section details unboxing, connecting power and pedals, and establishing connections to computers and mobile devices for enhanced functionality.

Unboxing and Initial Setup

Carefully unpack your Yamaha P115, ensuring all components are present: the piano itself, a power adapter, a music rest, and the owner’s manual. Inspect for any shipping damage immediately. Position the piano on a stable, level surface. Attach the music rest to the designated slots on the back of the instrument.

Before connecting power, familiarize yourself with the rear panel connections. The initial setup involves simply plugging in the power adapter and ensuring a secure connection. Avoid using excessive force. The P115 is now ready for basic operation and further configuration.

Connecting Power and Pedals

Ensure the Yamaha P115 is switched off before connecting the power adapter. Plug the adapter firmly into the DC IN jack on the rear panel and then into a grounded electrical outlet. For pedal connections, the P115 supports a sustain pedal (LP-1 optional) plugged into the dedicated SUSTAIN jack.

A three-pedal unit (UF7) can also be connected for more advanced control. Proper pedal connection enhances the playing experience, enabling nuanced expression. Verify secure connections to avoid intermittent signal loss during performance. Always use the specified Yamaha power adapter.

Connecting to Computers and Mobile Devices

The Yamaha P115 connects to computers and mobile devices via USB to MIDI. Use a standard USB A-to-B cable, plugging it into the USB TO HOST port on the piano and your device. This enables music software integration for recording, editing, and learning. No driver installation is typically needed for basic MIDI functionality on modern operating systems.

For iOS devices, an Apple Camera Connection Kit may be required. Explore compatible music apps for enhanced features and creative possibilities. Ensure a stable USB connection for seamless data transfer and reliable performance.

Navigating the P115 Interface

The P115’s interface features an intuitive control panel for selecting voices, adjusting effects, utilizing the metronome, and accessing recording functions with ease.

Understanding the Control Panel

The Yamaha P115’s control panel is designed for straightforward operation. Key components include the Power button, Volume slider for immediate sound adjustments, and the Category Select buttons. These buttons navigate through the diverse range of instrument voices available. The Grand Piano button provides instant access to the core piano sound.

Further controls manage functions like Dual and Split modes, allowing for layered or divided keyboard parts. The Metronome control enables rhythmic practice, while the Record button initiates the built-in recording feature. A dedicated panel section handles transport controls – Play, Pause, Stop – for playback of recorded performances. Understanding these elements unlocks the P115’s full potential.

Voice Selection and Effects

The Yamaha P115 boasts a diverse library of voices, accessible via the Category buttons – Piano, Organ, Strings, and more. Each category contains multiple instrument sounds, offering versatility for various musical styles. Reverb effects add spaciousness and depth to the sound, enhancing the realism of pianos and other voices.

Chorus effects create a richer, thicker tone, suitable for pads and strings. Adjusting the reverb and chorus levels allows for personalized soundscapes. Experimenting with different voice combinations and effects unlocks creative possibilities, tailoring the P115’s sound to individual preferences and musical needs.

Using the Metronome and Recording Functions

The P115’s built-in metronome is crucial for developing timing and rhythm. Adjust the tempo using the Tempo buttons, and select different time signatures to suit your practice needs. The recording function allows you to capture your performances directly onto the instrument. This feature is ideal for self-assessment and tracking progress.

Record one track at a time, layering parts to create full arrangements. Saved recordings can be played back, allowing you to analyze your playing and identify areas for improvement. The recording function enhances practice efficiency and fosters musical creativity.

Detailed Examination of P115 Functions

This section delves into the core functionalities of the Yamaha P115, including the GHS action, DSP, Split/Duo modes, and how they contribute to its sound.

Graded Hammer Standard (GHS) Action

The Yamaha P115 features the Graded Hammer Standard (GHS) action, a key component replicating the feel of an acoustic piano. Lower keys possess a heavier touch, while higher keys are lighter, mirroring the natural weighting of piano hammers. This provides a more expressive and realistic playing experience for pianists of all levels.

GHS action enhances dynamic control, allowing for nuanced performances. It’s designed for durability and responsiveness, offering consistent performance over time. While not fully weighted like higher-end actions, GHS provides a substantial improvement over simpler keyboard mechanisms, making the P115 a compelling option for beginners and intermediate players seeking an authentic piano feel.

Digital Signal Processing (DSP) and Sound Quality

Yamaha’s Digital Signal Processing (DSP) technology is central to the P115’s impressive sound quality. DSP accurately recreates the acoustic characteristics of a concert grand piano, delivering rich, resonant tones. The P115 utilizes Yamaha’s AWM Stereo Sampling, capturing authentic piano sounds with exceptional clarity.

This technology ensures a dynamic and expressive sound across the entire keyboard range. The P115 boasts 10 voices, including various piano types and instruments, all enhanced by DSP. The result is a remarkably realistic and immersive playing experience, exceeding expectations for a digital piano in its price range.

Split and Duo Modes Explained

The Yamaha P115 offers versatile playing options with its Split and Duo modes. Split mode allows you to divide the keyboard, assigning different voices to the left and right hands – ideal for basslines and accompaniment. Duo mode effectively splits the keyboard into two equal ranges, allowing two players to practice or perform simultaneously, each with their own middle C.

These modes enhance learning and collaborative playing. Adjusting the split point is straightforward, and both modes are easily accessible through the P115’s intuitive control panel, providing flexibility for diverse musical scenarios and skill levels.

Troubleshooting Common P115 Issues

This section details solutions for typical problems, including sound malfunctions, connectivity errors with devices, and resolving issues with pedals or control functions.

Addressing Sound Problems

If no sound is produced, verify the volume level on both the P115 and any connected devices. Ensure headphones aren’t plugged in, silencing the speakers. Check the speaker connections and confirm they are securely fastened. Experiment with different voices to rule out a voice-specific issue. If the sound is distorted, lower the volume or adjust the DSP settings. Consider resetting the P115 to its factory defaults as a last resort, but note this will erase custom settings. Finally, confirm the audio interface is correctly configured if connecting to a computer.

Resolving Connectivity Issues

When connecting to a computer via USB, ensure you’ve installed the Yamaha USB-MIDI driver. Verify the USB cable is functioning correctly by testing with another device. Check the P115’s USB settings within the function menu, selecting the appropriate MIDI mode. Confirm your Digital Audio Workstation (DAW) recognizes the P115 as a MIDI input device. If issues persist, try a different USB port on your computer. Restart both the P115 and your computer. Ensure compatibility with your operating system and DAW software versions.

Fixing Pedal and Control Malfunctions

If the sustain pedal isn’t responding, check the cable connection at both the pedal and the P115. Ensure the pedal is a Yamaha-compatible model or a generic switch pedal. Test with a different pedal if possible. For unresponsive buttons, power cycle the P115. Clean the control panel with a soft, dry cloth. If problems continue, reset the P115 to factory settings via the function menu – note this will erase custom settings. Contact Yamaha support if issues persist, providing detailed descriptions of the malfunctions.

Yamaha P115 Maintenance and Care

Regular cleaning and firmware updates ensure longevity. Store the P115 in a cool, dry place, covered to protect from dust and potential damage.

Cleaning and Dust Removal

Maintaining a clean Yamaha P115 is crucial for its lifespan and performance. Regularly dust the exterior with a soft, dry cloth to prevent buildup. Avoid using liquid cleaners directly on the instrument; instead, lightly dampen the cloth. For stubborn marks, a mild, non-abrasive furniture polish can be used sparingly on the cabinet. Never spray liquids directly onto the piano. Pay attention to the keys, gently wiping them down to remove oils and fingerprints. Ensure the piano is powered off and unplugged before cleaning. Consistent dust removal prevents internal component issues and preserves the P115’s aesthetic appeal.

Software Updates and Firmware

Yamaha periodically releases firmware updates for the P115 to enhance functionality and address potential issues. Check the official Yamaha website regularly for available updates. Download the latest firmware and follow the instructions carefully for installation, typically involving a USB drive. Ensure the piano remains powered on during the update process to prevent data corruption. Firmware updates can improve sound quality, add new features, or fix bugs. Back up any custom settings before updating. Updating the firmware keeps your P115 operating at its best and ensures compatibility with future features.

Long-Term Storage Guidelines

If storing your Yamaha P115 for an extended period, proper preparation is crucial. First, thoroughly clean the piano to remove dust and debris. Disconnect all cables and remove the music rest. Cover the piano with a soft cloth to protect the finish. Store it in a cool, dry environment, avoiding direct sunlight and extreme temperatures. Periodically check the storage area for humidity. Avoid stacking heavy objects on top of the piano. Consider removing the batteries to prevent corrosion. Proper storage ensures your P115 remains in excellent condition.

Advanced P115 Techniques

Explore customizing voice settings, utilizing MIDI functionality for recording, and discovering performance recording options to unlock the full potential of your Yamaha P115.

Customizing Voice Settings

The Yamaha P115 allows extensive voice customization, enabling users to tailor sounds to their preferences. Adjust reverb depth and type for spaciousness or intimacy. Modify brightness to achieve warmer or brighter tones. Experiment with chorus effects for richer textures. Fine-tune the overall volume and pan position for balanced stereo imaging.

Furthermore, users can layer voices, creating unique combinations. Explore different equalization settings to sculpt the frequency response. Save customized settings as user registrations for quick recall during performances or practice sessions. This personalization enhances the playing experience and allows for expressive musicality.

Utilizing MIDI Functionality

The Yamaha P115 boasts robust MIDI capabilities, expanding its versatility. Connect to computers via USB for seamless integration with Digital Audio Workstations (DAWs) like Cubase or Logic Pro. Record performances, edit MIDI data, and create professional-quality music productions. The P115 functions as a MIDI controller, enabling control over virtual instruments and software synthesizers.

Additionally, MIDI connectivity facilitates communication with other MIDI devices, such as sound modules or sequencers. Explore advanced features like MIDI learn for customized control assignments. This unlocks a world of creative possibilities beyond the piano’s built-in sounds.

Exploring Performance Recording Options

The Yamaha P115 offers built-in recording functionality, allowing you to capture your musical ideas directly on the instrument. Utilize the one-track recording feature to layer performances or practice sessions. Recordings are saved internally and can be transferred to a computer via USB for further editing and sharing.

For more complex arrangements, consider connecting the P115 to a DAW through MIDI or USB audio. This unlocks multi-track recording capabilities and access to a wider range of editing tools, enhancing your creative workflow and production quality.

Yamaha P115 vs. Competitors

Compared to rivals, the P115 balances affordability with Yamaha’s renowned sound quality and GHS action, offering a compelling option for beginners and intermediate players.

Comparing to Similar Digital Pianos

The Yamaha P115 frequently appears in comparisons with models like the Casio Privia PX-160 and the Roland FP-30. The Casio often boasts a lower price point, but typically sacrifices some of the nuanced sound reproduction found in the Yamaha. Roland’s FP-30 provides a more advanced key action and broader sound palette, however, it generally comes at a higher cost.

The P115 distinguishes itself with Yamaha’s Graded Hammer Standard (GHS) action, aiming to replicate the feel of an acoustic piano. While not identical to higher-end actions, it provides a satisfying playing experience for its price range. Considering features, sound quality, and cost, the P115 occupies a sweet spot for many aspiring pianists.

P115 Strengths and Weaknesses

The Yamaha P115’s strengths lie in its realistic piano sound, thanks to Yamaha’s digital signal processing, and its GHS action, offering a weighted key feel suitable for learning. Its portability is also a plus, being relatively lightweight for an 88-key digital piano. However, the built-in speakers are somewhat limited in dynamic range, potentially requiring external amplification for larger spaces.

Weaknesses include a relatively basic user interface compared to some competitors, and a limited selection of onboard voices. While sufficient for many, advanced players might find the sound customization options somewhat restrictive. Overall, it’s a strong value proposition, balancing features and affordability.

Resources for Yamaha P115 Owners

Access official Yamaha support, online forums filled with helpful users, and readily available replacement parts to enhance your P115 experience and resolve issues.

Official Yamaha Support Website

Yamaha’s official website is the primary resource for P115 owners, offering a wealth of information directly from the manufacturer. Here, you can download the complete P115 user manual in PDF format, ensuring you always have access to detailed instructions and specifications.

Furthermore, the support section provides FAQs addressing common issues, troubleshooting guides to resolve technical difficulties, and driver downloads for seamless computer connectivity. You’ll also find warranty information and contact details for Yamaha customer support should you require personalized assistance. Regularly checking this site ensures you stay updated with the latest firmware and helpful resources.

Online Forums and Communities

Numerous online forums and communities dedicated to digital pianos, and specifically the Yamaha P115, provide a valuable platform for owners to connect, share experiences, and seek assistance. These forums often feature detailed discussions on troubleshooting, performance techniques, and customization options not readily found in the official manual.

Users frequently post solutions to common problems, share custom voice settings, and offer advice on maximizing the P115’s capabilities. Engaging with these communities can provide quick answers to your questions and foster a deeper understanding of your instrument, supplementing the official Yamaha support resources.

Finding Replacement Parts

Locating replacement parts for your Yamaha P115 can typically be achieved through official Yamaha parts distributors or authorized service centers. Online retailers specializing in musical instrument components also offer a wide selection of parts, including pedals, power supplies, and internal components.

When ordering parts, it’s crucial to have your P115’s serial number readily available to ensure compatibility. Yamaha’s official website provides a parts lookup tool, simplifying the process. Always verify the part number and specifications before purchasing to avoid incorrect replacements, potentially damaging your instrument.

Yamaha P115 Specifications

The P115 features 88 graded hammer standard keys, 192 polyphony, and weighs approximately 25.4 lbs, requiring 12V DC power for operation.

Physical Dimensions and Weight

The Yamaha P115 boasts a compact design, making it suitable for various living spaces. Its dimensions are 52.2″ (1326 mm) in width, 11.6″ (295 mm) in depth, and 6.7″ (170 mm) in height.

Notably, the P115 weighs approximately 25.4 pounds (11.5 kg). This relatively lightweight construction enhances portability, allowing for easy transportation and setup in different locations.

These measurements ensure the piano fits comfortably in apartments, classrooms, or performance venues without occupying excessive space, while remaining stable during playing.

Technical Specifications (Polyphony, Voices, etc;)

The Yamaha P115 features 64 notes of polyphony, enabling rich and complex sound layering during performances. It offers 10 voices, including Grand Piano, Electric Piano, Organ, Strings, and more, providing diverse sonic palettes.

Furthermore, the P115 utilizes Yamaha’s Graded Hammer Standard (GHS) action for a realistic piano feel. It incorporates Digital Signal Processing (DSP) technology for high-quality sound reproduction.

The piano supports MIDI connectivity and includes built-in speakers for convenient practice and performance, alongside a headphone jack for private sessions.

Power Requirements

The Yamaha P115 operates on a standard AC input of 100-240V, 50/60Hz, making it adaptable to various global power standards. It consumes approximately 20W during typical operation, ensuring energy efficiency.

A DC 12V adapter is included for powering the instrument, providing a stable and reliable power source. The P115 also supports optional battery operation using eight AA-size batteries (not included), offering portability for performances or practice sessions away from power outlets.

Always use the specified adapter to prevent damage.

Yamaha P115: Frequently Asked Questions

This section addresses common user inquiries regarding the Yamaha P115, including setup, functionality, troubleshooting, and warranty details for a seamless experience.

Common Questions Answered

Q: Can I connect the P115 to my computer? A: Yes, using a USB cable allows MIDI connectivity for recording and using music software. Q: How do I change the voices? Utilize the ‘Voice’ selection button to cycle through the available instrument sounds. Q: Is the P115 weighted?

It features Graded Hammer Standard (GHS) action, simulating an acoustic piano’s feel. Q: What if there’s no sound? Check the volume, headphones, and power connections. Q: How do I update the firmware? Download updates from Yamaha’s official support website and follow the provided instructions carefully. Q: Where can I find replacement parts?

Explore Yamaha’s website or authorized dealers for genuine parts. Q: What is the warranty period? Refer to the warranty information included with your purchase for specific details and coverage terms. Remember to register your product for extended benefits.

Warranty Information

Yamaha provides a limited warranty for the P115 digital piano, typically covering manufacturing defects in materials and workmanship. The standard warranty period is one year from the date of original purchase. This warranty doesn’t cover damage resulting from misuse, accidents, unauthorized modifications, or normal wear and tear.

To claim warranty service, retain your proof of purchase and contact Yamaha customer support or an authorized service center. Registration of your P115 extends benefits. Carefully review the complete warranty details included with your instrument for specific terms, conditions, and exclusions.

Extended warranties may be available for purchase, offering additional coverage beyond the standard period. Always adhere to Yamaha’s guidelines for maintaining warranty validity.

jeep grand cherokee owner’s manual

This manual is your guide to maximizing the enjoyment and longevity of your 2026 Jeep Grand Cherokee, offering crucial insights into its features and operation․

Understanding Your Vehicle

Your Jeep Grand Cherokee is engineered for both on-road comfort and legendary off-road capability․ Familiarizing yourself with its systems – including the advanced 4×4 options – is key․ This section details the vehicle’s core components, from the hybrid electric powertrain to the Uconnect infotainment system․ Understanding these features ensures safe and confident operation, allowing you to fully experience the freedom a Jeep provides, whether navigating city streets or conquering challenging terrain․

Importance of the Owner’s Manual

This Owner’s Manual contains vital information for safe and efficient operation of your 2026 Jeep Grand Cherokee․ It details maintenance schedules, explains warning indicators, and outlines safety features like the airbag system and Electronic Stability Control․ Ignoring this information could lead to improper vehicle use, potential damage, or even accidents․ Regularly reviewing this manual ensures you maximize your Jeep’s performance and longevity, protecting your investment and ensuring peace of mind․

Vehicle Overview

The 2026 Jeep Grand Cherokee blends legendary 4×4 capability with modern luxury and advanced technology, offering a versatile and refined driving experience․

Grand Cherokee Model Trims

The 2026 Jeep Grand Cherokee offers a diverse range of trims to suit every lifestyle and preference․ These include the Laredo, Altitude, Limited, Overland, Summit, and Trailhawk․ Each trim level builds upon the previous one, adding more premium features and capabilities․

Higher trims boast luxurious interiors, advanced technology, and enhanced off-road equipment․ The Trailhawk is specifically designed for serious off-roading, while the Summit provides ultimate luxury․ Explore each trim to find the perfect Grand Cherokee for your needs!

Key Features and Specifications

The 2026 Jeep Grand Cherokee showcases a powerful engine, advanced 4×4 systems, and a luxurious interior․ Key features include the Uconnect infotainment system, available hybrid electric powertrain, and numerous advanced driver assistance systems (ADAS)․

Specifications vary by trim, but generally include a spacious cabin, ample cargo space, and impressive towing capabilities․ Expect leading-edge technology and a refined driving experience, making the Grand Cherokee a standout in its class․

Operating Your Vehicle

Familiarize yourself with starting, stopping, driving modes, and the 4×4 system for optimal performance․ Understanding dashboard indicators ensures safe and informed driving․

Starting and Stopping the Engine

To start your Grand Cherokee, ensure the brake pedal is firmly depressed and press the ignition button․ The vehicle may not start if these conditions aren’t met․ For a smooth stop, gently apply the brake pedal, bringing the vehicle to a complete halt․

Always engage the parking brake when parked, especially on inclines․ Avoid prolonged idling to conserve fuel and reduce emissions․ Refer to the instrument panel for any warning lights during startup or operation, and consult the full manual for detailed troubleshooting steps․

Driving Modes and 4×4 Systems

Your Grand Cherokee boasts a selection of driving modes – Auto, Sport, Snow, and Rock – to optimize performance for various conditions․ Utilize the 4×4 system selector to engage appropriate settings for terrain․

The Auto mode intelligently distributes torque, while Sport enhances responsiveness․ Snow mode provides increased traction, and Rock is ideal for off-road challenges․ Understanding these systems ensures optimal control and capability, maximizing your Jeep’s legendary performance on any surface․

Understanding the Dashboard Indicators

The Grand Cherokee’s dashboard features a comprehensive array of indicators, providing vital information about your vehicle’s status․ Familiarize yourself with warning lights – check engine, ABS, airbag – and informational icons like fuel level and temperature․

Pay close attention to any illuminated warning lights, consulting this manual for specific actions․ Ignoring these signals could lead to more significant issues․ Proactive monitoring ensures safe and reliable operation of your Jeep․

Maintenance Schedule

Adhering to the recommended maintenance schedule is crucial for preserving your Grand Cherokee’s performance and reliability, ensuring a long and enjoyable ownership experience․

Routine Maintenance Tasks

Regular checks are vital for optimal performance․ This includes inspecting fluid levels – oil, coolant, brake, power steering, and windshield washer – monthly․ Tire pressure should be verified and adjusted as needed, alongside visual tire tread inspections․

Exterior lighting, including headlights, taillights, and turn signals, must be routinely tested․ Windshield wipers should be checked for wear and tear, and replaced when streaking occurs․ Following these simple steps contributes significantly to your Grand Cherokee’s safety and longevity․

Oil Change Procedures

Maintaining proper oil levels is crucial for engine health․ Warm up the engine, then safely lift the vehicle․ Locate the oil drain plug and carefully remove it, allowing the old oil to drain completely․ Replace the oil filter with a new, approved filter․

Reinstall the drain plug, tightening to the specified torque․ Add the recommended amount of new oil, checking the dipstick to confirm the correct level․ Properly dispose of used oil at a designated recycling center․

Tire Maintenance and Rotation

Regular tire maintenance ensures optimal performance and safety․ Check tire pressure monthly, inflating to the recommended PSI found on the doorjamb sticker․ Inspect tires for wear, damage, and uneven tread․ Rotate tires every 5,000-7,500 miles following the pattern in this manual․

Rotation promotes even wear, extending tire life․ Ensure proper wheel alignment to prevent premature or uneven tire degradation․ Replace tires when tread depth reaches the legal limit․

Safety Features

Your Grand Cherokee boasts advanced safety technologies, including airbags, ESC, and ADAS, designed to protect you and your passengers on every journey․

Airbag System Information

The Grand Cherokee’s airbag system is a crucial component of its overall safety design, working in conjunction with seatbelts to provide maximum protection during a collision․ This system includes front, side, and curtain airbags strategically positioned throughout the vehicle․ It’s vital to understand how the system functions, including deployment indicators and potential risks․ Always ensure passengers, especially children, are properly restrained․ Refer to the manual for detailed information regarding airbag deactivation procedures (if equipped) and specific warnings to ensure optimal safety performance․ Improper use can increase the risk of injury․

Electronic Stability Control (ESC)

The Grand Cherokee’s Electronic Stability Control (ESC) system is designed to assist you in maintaining control during challenging driving conditions, like slippery roads or sudden maneuvers․ ESC detects potential skids and selectively applies brakes to individual wheels, helping to steer the vehicle back on its intended path․ A flashing ESC indicator light signals the system is actively engaged․ Remember, ESC isn’t a substitute for cautious driving; always adjust your speed and driving style to suit road conditions․ Understanding its limitations is key to safe operation․

Advanced Driver Assistance Systems (ADAS)

Your Grand Cherokee may be equipped with various ADAS features designed to enhance safety and convenience, including Adaptive Cruise Control, Lane Departure Warning, and Automatic Emergency Braking․ These systems utilize sensors and cameras to monitor the vehicle’s surroundings and provide alerts or assistance․ Familiarize yourself with the specific functions and limitations of each system․ ADAS features are aids, not substitutes for attentive driving; always remain alert and in control of the vehicle․

Interior Features

Discover a refined cabin experience with the Uconnect infotainment system, comfortable seating, and ample cargo space designed for both passengers and gear․

Uconnect Infotainment System

The Uconnect system is your central hub for connectivity and entertainment․ It features a responsive touchscreen display, offering intuitive access to navigation, media, and vehicle settings․ Seamless smartphone integration via Apple CarPlay and Android Auto is standard․ Stay connected on the go with available Wi-Fi hotspot capability․ Voice command functionality allows for hands-free operation, enhancing driver safety․ Explore personalized profiles and customizable features for a tailored user experience․ Discover a world of apps and services designed to elevate your journey․

Climate Control System

Your Grand Cherokee’s climate control ensures passenger comfort in all conditions․ It offers dual-zone or multi-zone automatic temperature control, allowing personalized settings․ Quickly defrost or defog with powerful front and rear window systems․ Available features include heated and ventilated front seats, and a heated steering wheel for added convenience․ Air filtration systems maintain optimal air quality․ Remote start functionality allows pre-conditioning the cabin before entering the vehicle, ensuring a comfortable ride from the start․

Seating and Cargo Area

The Grand Cherokee offers versatile seating configurations, often including options for five or seven passengers․ Premium materials and adjustable features enhance comfort on long journeys․ Power-folding rear seats provide easy access to a spacious cargo area, maximizing utility․ A power liftgate simplifies loading and unloading; Explore available cargo organizers and accessories to optimize space․ The interior is designed for both passenger enjoyment and practical cargo-carrying needs, adapting to your lifestyle․

Exterior Features

Discover the Grand Cherokee’s striking design, advanced lighting systems, and robust towing capabilities, all detailed within this section for optimal vehicle utilization․

Lighting System Operation

Your Grand Cherokee features a sophisticated lighting system designed for optimal visibility and safety․ This includes automatic headlights, daytime running lights, and turn signals․ Learn how to adjust headlight aim for improved nighttime driving․ Understand the functionality of the fog lights, crucial for inclement weather․ The manual details operation of interior lighting, including map lights and courtesy lamps․ Explore the exterior lamp replacement procedures to maintain optimal brightness․ Familiarize yourself with the high beam assist feature, enhancing safety during highway travel․ Proper lighting ensures a secure driving experience․

Windshield Wipers and Washers

Maintaining clear visibility is paramount, and your Grand Cherokee’s windshield wipers and washers are key to this․ This section details wiper operation, including variable speed settings and intermittent wipe functions․ Learn how to activate the windshield washers and rear window washer․ Understand procedures for replacing wiper blades for optimal performance․ The manual explains the washer fluid reservoir location and proper fluid type․ Discover the rain-sensing wiper feature, automatically adjusting speed to precipitation․ Ensure clear vision for safe driving in all conditions․

Towing Capabilities and Equipment

Your Grand Cherokee is capable of towing, but understanding its limits is crucial for safety․ This section outlines maximum towing capacity based on engine and configuration․ Learn about selecting the correct trailer hitch receiver and wiring harness․ Understand proper trailer loading and weight distribution techniques․ The manual details brake controller operation, if equipped, for enhanced stopping power․ Review safety checklists before each tow, ensuring secure connections and appropriate tire inflation․ Always adhere to local towing regulations․

Troubleshooting

This section provides guidance for resolving common issues, including jump-starting procedures and emergency responses, ensuring you’re prepared for unexpected situations on the road․

Common Issues and Solutions

Encountering minor issues is normal; this guide offers solutions for frequently reported problems․ Addressing concerns like dashboard indicator lights, Uconnect system glitches, or unexpected noises promptly can prevent escalation․ Refer to detailed diagrams and step-by-step instructions for resolving issues such as a malfunctioning lighting system or windshield wipers․

For more complex problems, consult a qualified Jeep dealer․ Remember, attempting repairs without proper knowledge could void your warranty or cause further damage․ Prioritize safety and professional assistance when needed․

Jump Starting Procedures

If your Grand Cherokee’s battery is depleted, a jump start can get you moving․ Ensure the donor vehicle’s voltage matches yours․ Connect the red cable to the positive terminals of both batteries, then the black cable to the donor’s negative terminal and a grounded metal part on your Jeep․

Start the donor vehicle, then your Grand Cherokee․ Disconnect cables in reverse order․ Caution: Incorrect connection can damage electrical systems․

What to Do in an Emergency

In case of a breakdown, safely pull over, activate hazard lights, and assess the situation․ If possible, move your Grand Cherokee to a safe location away from traffic․ Contact emergency services if needed, providing your exact location․

Refer to the roadside assistance information in this manual․ Never attempt repairs on a busy roadway․ Prioritize your safety and the safety of others․

Warranty Information

Your Jeep Grand Cherokee is protected by a comprehensive warranty, including basic, powertrain, and corrosion coverage – details are outlined within this manual․

Basic Vehicle Warranty

The Basic Vehicle Warranty covers defects in materials or workmanship for a specified period, typically 3 years or 36,000 miles, whichever comes first․ This comprehensive coverage protects against a wide range of potential issues affecting the vehicle’s functionality․ It includes components like paint, interior trim, and various mechanical systems; Refer to the warranty booklet for a complete list of covered parts and exclusions․ Maintaining your vehicle according to the recommended schedule is crucial for warranty validity․

Powertrain Warranty

The Powertrain Warranty provides extended coverage for the heart of your Jeep Grand Cherokee, typically 5 years or 60,000 miles․ This specifically protects major components like the engine, transmission, and drivetrain․ It offers peace of mind against costly repairs related to these critical systems․ Detailed information regarding covered parts, limitations, and required maintenance for warranty preservation can be found within the official warranty guide․

Corrosion Protection Warranty

Jeep stands behind the durability of your Grand Cherokee with a dedicated Corrosion Protection Warranty, often lasting up to 5 years or 100,000 miles․ This warranty safeguards against rust-through of body panels due to manufacturing defects․ Proper vehicle maintenance, including regular washing and undercarriage inspections, is crucial for warranty validity․ Refer to the warranty booklet for specific coverage details and exclusions regarding corrosion protection․

Mopar Accessories

Enhance your Grand Cherokee with genuine Mopar accessories, designed for perfect fit and function, offering interior comforts and exterior styling options․

Interior Accessories

Personalize your Grand Cherokee’s cabin with Mopar’s wide range of interior accessories․ Protect your upholstery with custom-fit seat covers, available in various materials and designs․ Enhance organization with cargo organizers, trunk liners, and all-weather floor mats․ Add convenience with illuminated door sill guards, and a wireless charging pad for your mobile devices․ Consider premium shift knobs and stainless steel pedal kits for a refined touch․ Mopar interior accessories are engineered to seamlessly integrate with your vehicle’s design, providing both style and functionality․

Exterior Accessories

Customize your Grand Cherokee’s exterior with Mopar’s selection of accessories designed for both style and utility․ Protect your paint with side steps, splash guards, and door edge guards․ Enhance its appearance with chrome accents, body side moldings, and a rear spoiler․ Improve cargo carrying capacity with a roof rack or cargo carrier․ Consider all-weather floor mats and a pet barrier for added protection․ Mopar exterior accessories are rigorously tested to ensure a perfect fit and lasting durability, complementing your vehicle’s rugged appeal․

Performance Upgrades

Elevate your Grand Cherokee’s capabilities with Mopar’s performance upgrades, engineered to enhance its already impressive off-road prowess․ Explore options like lift kits for increased ground clearance, performance exhaust systems for a bolder sound, and upgraded suspension components for improved handling․ Consider skid plates to protect vital undercarriage components during challenging terrain․ These accessories are designed to seamlessly integrate with your vehicle, delivering enhanced performance and durability, ensuring your Jeep conquers any adventure․

Technical Specifications

This section details the Grand Cherokee’s engine, transmission, dimensions, and capacities, providing essential data for informed maintenance and understanding your vehicle’s capabilities․

Engine Specifications

The 2026 Jeep Grand Cherokee boasts a range of powerful and efficient engine options․ Notably, a new Hybrid Electric Powertrain is available, offering a blend of performance and sustainability․ Standard engines include a 3․6L V6, delivering robust horsepower and torque for various driving conditions․ Premium trims feature a potent 5․7L V8, enhancing towing capacity and overall performance; Detailed specifications, including displacement, horsepower, torque, and fuel economy ratings, are provided within this section to assist owners in understanding their engine’s capabilities and maintenance requirements․

Transmission Specifications

The 2026 Jeep Grand Cherokee utilizes advanced transmission systems designed for smooth and responsive performance; Most models feature an eight-speed automatic transmission, optimized for both fuel efficiency and dynamic driving experiences․ This transmission offers precise gear changes and enhanced control in various terrains․ Specific gear ratios and operational characteristics are detailed within this section․ Understanding these specifications is crucial for proper vehicle operation and maintenance, ensuring optimal performance and longevity of the transmission system․

Dimensions and Capacities

This section details the crucial physical specifications of your 2026 Jeep Grand Cherokee․ It includes overall length, width, height, and wheelbase measurements, vital for parking and navigating tight spaces․ Interior dimensions, such as headroom and legroom, are also provided for passenger comfort assessment․ Furthermore, you’ll find key capacities – fuel tank volume, cargo space with seats up/down, and towing capacity – essential for planning trips and hauling loads safely and effectively․

2026 Jeep Cherokee Updates

The redesigned 2026 Jeep Cherokee boasts a new hybrid electric powertrain and striking design features, enhancing performance and style for adventurous drivers․

Hybrid Electric Powertrain

The 2026 Jeep Cherokee introduces a cutting-edge hybrid electric powertrain, blending power with efficiency for an exceptional driving experience․ This innovative system seamlessly combines a gasoline engine with an electric motor, delivering impressive fuel economy and reduced emissions․ Drivers can expect enhanced responsiveness and a quieter ride, while contributing to a more sustainable future․ The hybrid technology optimizes performance across various terrains, ensuring capability remains a Jeep hallmark․ Expect a smooth transition between power sources, maximizing both efficiency and capability․

New Design Features

The 2026 Jeep Cherokee boasts a refreshed exterior and interior design, enhancing both its style and functionality․ Expect a modern aesthetic with refined lines and a more aerodynamic profile․ Inside, the cabin features premium materials and an updated infotainment system for a more connected experience․ Attention to detail is evident throughout, creating a comfortable and sophisticated atmosphere․ These design enhancements elevate the Cherokee’s overall appeal, blending rugged capability with contemporary elegance, ensuring a striking presence on any road․

Locating Service and Support

Find authorized Jeep dealers online or through the official Jeep website for maintenance and repairs․ Access owner resources and support anytime, anywhere․

Finding a Jeep Dealer

Locating a qualified Jeep dealer for service is straightforward․ Utilize the official Jeep website’s dealer locator tool, entering your zip code to pinpoint nearby authorized service centers․ These dealerships employ certified technicians trained specifically on Jeep vehicles, ensuring expert maintenance and repair․

Genuine Mopar parts are readily available at these locations, guaranteeing quality and compatibility․ Whether you require routine maintenance, warranty work, or addressing specific concerns, a Jeep dealer provides a reliable and professional experience․ Prompt service and customer satisfaction are prioritized․

Online Owner Resources

Jeep provides a comprehensive suite of online resources for Grand Cherokee owners․ The official Jeep website hosts digital versions of the owner’s manual, allowing convenient access to vehicle information anytime, anywhere․ Explore frequently asked questions, troubleshooting guides, and helpful videos demonstrating various features․

Register your vehicle online to receive important updates, recall notifications, and exclusive offers․ Access Mopar parts catalogs and schedule service appointments directly through the online portal, streamlining your ownership experience․